
If a burst supply line floods your kitchen at 2 a.m., you need to shut off the water, document the damage, and call your insurer right away. Insurance Claims Explained starts with understanding what your policy covers, what your adjuster may approve, and which repairs must wait. Water damage claims often turn on timing, evidence, and documentation, and missing one step can slow everything down.
Key Takeaways
- Shut off the water source, document damage with photos, and contact your insurer immediately.
- Use professional extraction, drying, and containment to prevent further damage and mold growth.
- Keep damaged materials, receipts, moisture readings, and a detailed timeline for insurance claims.
- Check policy coverage, limits, and exclusions, especially for sudden damage versus seepage or flooding.
- Coordinate with the adjuster and contractor, and get repair scope approved before starting major restoration.
What to Do After Water Damage
After water damage occurs, you should act quickly to limit further loss and protect your insurance claim. First, shut off the source if you can do it safely, then document every affected room with clear photos and notes.
Keep damaged materials, receipts, and a timeline so your file supports water damage restoration and insurance claims review. Contact your insurer promptly and ask what coverage applies, including emergency mitigation, contents, and temporary living costs.
Avoid discarding items until the adjuster says it’s okay. If conditions allow, move valuables to a dry area and reduce moisture with ventilation.
You’re not alone in this process; organized records and fast communication help you stay in control, protect your property, and work smoothly with your claims team.
How Water Damage Restoration Starts
Water damage restoration starts with a professional inspection to determine the source, extent, and category of water intrusion. You’ll work with a technician who checks structural materials, moisture levels, and affected contents to build a clear drying plan.
They’ll identify hidden water in walls, flooring, and insulation, then isolate the damaged area to prevent spreading. Next, they’ll shut off unsafe utilities if needed and begin water extraction with pumps or vacuums.
Air movers and dehumidifiers then reduce humidity and speed evaporation. You’ll get direct communication about what’s happening, so you can stay informed and confident throughout the process.
This first phase sets the technical baseline for restoration, helping your team control damage quickly, protect your property, and prepare the space for repairs.
Document Water Damage for Your Claim
You should photograph all visible water intrusion, structural damage, and affected contents before any cleanup changes the scene.
Create a damage inventory that lists each impacted item, its condition, and estimated replacement or repair value, then keep receipts and contractor notes with it.
Record a clear claim timeline that shows when the loss occurred, when you reported it, and when each restoration step began.
Photo Evidence
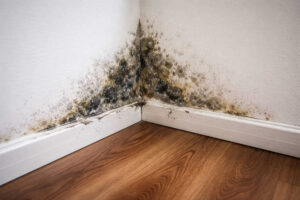
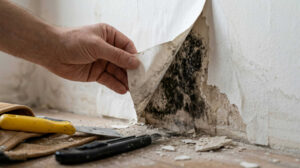
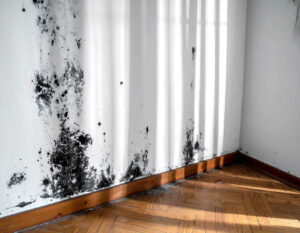
Clear photo evidence can make or break a water damage insurance claim because it shows the loss before cleanup, demolition, or repairs change the scene.
You should photograph every affected area in bright, even light, and include wide shots plus close-ups of stains, swelling, warped materials, and visible intrusion points.
Keep your camera steady and capture date-stamped images whenever possible.
Take photos from multiple angles so the adjuster can verify extent and source.
If you can, preserve original files with metadata intact; don’t edit, crop, or filter them.
Upload copies to secure storage and share them with your contractor and insurer.
When you document clearly, you help your claim stay organized, credible, and aligned with restoration expectations.
Damage Inventory
After you’ve captured photos, build a detailed damage inventory to match each image with specific losses in the home.
List every affected room, fixture, appliance, and personal item, and note the material type, visible condition, and extent of saturation or warping. Include brand names, model numbers, purchase dates, and estimated replacement values when you can.
Separate structural damage from contents damage so your claim file stays organized and easy to review. Use consistent labels that mirror the photo numbers, and record missing items, stains, odors, and any safety hazards.
If you’re working with a restoration team, ask them to verify moisture readings and affected materials. A precise inventory helps you document the full scope, reduce disputes, and speak confidently with your insurer as part of the community facing recovery together.
Claim Timeline
To support your claim, build a clear timeline that links the water event, your response actions, and each stage of damage progression.
Record the date and time you discovered the leak, when you shut off water, and when you notified your insurer.
Log every inspection, mitigation step, and contractor visit in sequence.
Pair each entry with photos, videos, receipts, moisture readings, and repair estimates so you can verify cause, scope, and escalation.
If the damage changed over hours or days, note those changes precisely, including affected rooms, materials, and odor, staining, or mold indicators.
Keep one master log and update it daily.
This organized record helps adjusters confirm coverage faster and shows you’re part of a prepared, informed community.
How Water Damage Insurance Coverage Works
You need to review your policy limits first, because your insurer will only pay up to the coverage cap listed in your contract.
You also have to confirm whether the source of water damage is covered, since sudden accidental losses are often covered while gradual leaks, flooding, and other excluded causes may not be.
Then file the claim within the required timeframe and submit the documentation your insurer requests so you can keep the claim process moving.
Policy Coverage Limits
Policy coverage limits determine how much your insurer will pay for water damage restoration, and they can shape every step of the claims process.
You should review your declarations page, because it lists the maximum payout for each coverage section and any special sublimits. If repair costs exceed those amounts, you’ll be responsible for the balance, so accurate estimates matter.
Your adjuster will compare documented losses against the policy cap, then apply deductibles and any applicable endorsements.
You can protect your claim by gathering itemized invoices, photos, and moisture readings that support the full scope of work.
When you understand your limit early, you can coordinate restoration decisions with confidence and stay aligned with your insurer’s expectations.
Covered Vs. Excluded Causes
After you understand your coverage limits, the next step is checking whether the water damage itself is covered at all. You’ll usually see a split between sudden, accidental losses and excluded causes. Your policy often protects you when a pipe bursts, a supply line fails, or an appliance overflows.
It usually won’t cover gradual leaks, seepage, neglect, floodwater, or groundwater intrusion.
- Sudden discharge: often covered
- Wear and tear: usually excluded
- Flood or surface water: typically excluded
- Sewer backup: covered only with an endorsement
You belong to the group of policyholders who can reduce surprises by matching the source of water to the policy language. That’s the technical test insurers use before they assess restoration costs or approve payment.
Claim Filing Requirements
Once you’ve confirmed the loss may be covered, file the claim promptly and document the damage before any major cleanup starts.
You should contact your insurer, open a claim number, and request the exact documents they require. Typically, you’ll provide photos, videos, dates of loss, a list of affected rooms and contents, repair estimates, and receipts for emergency mitigation.
Keep every invoice and moisture reading from your restoration contractor so your file stays complete. You’ll also need to cooperate with the adjuster, answer questions clearly, and allow inspections.
Don’t discard damaged materials until the insurer authorizes disposal. If you belong to a policyholder community, share updates with your agent and contractor so everyone stays aligned.
Quick, accurate filing helps protect coverage and speeds claim review.
How to File a Water Damage Claim
To file a water damage claim, you should contact your insurer as soon as it’s safe, report the date and cause of the loss, and ask exactly what documentation they need.
Then submit your claim number, policy details, and a concise loss summary. Keep your language factual and consistent so your file stays clean and credible.
- Photograph all affected rooms, surfaces, and belongings.
- Save receipts for emergency mitigation and temporary repairs.
- Record dates, times, and names of everyone you speak with.
- Send documents through the insurer’s preferred portal or email.
After you file, monitor your inbox and voicemail for requests, and respond quickly.
You’re part of a process that works best when you stay organized, calm, and precise.
Coordinating Adjusters and Contractors
You’ll need to align the adjuster’s site visit with the contractor’s inspection so both parties document the same damage conditions.
Keep contractor communication direct and timely, since discrepancies in measurements, materials, or cause of loss can delay approval.
You should also confirm scope approval timing before work starts, because restoration crews can’t reliably proceed until the insurer authorizes the covered repairs.
Adjuster Site Visits
When the adjuster visits the property, you should have the restoration contractor present so both parties can review the damage, verify the scope, and resolve questions on the spot. You’ll help create a shared field record that reflects moisture readings, material loss, and safety concerns.
Stay focused on measurable details and let the inspection stay tied to observed conditions, not assumptions. This approach supports a smoother claim review and keeps everyone working from the same facts.
- Confirm access to all affected rooms.
- Point out visible and hidden damage.
- Match photos to room-by-room findings.
- Note any required containment or drying setup.
When you stay organized, you strengthen your place in the process and help the team move forward with confidence.
Contractor Communication
Clear communication keeps the claim moving between the adjuster and the contractor. You should share photos, moisture readings, loss dates, and affected materials so both parties work from the same record.
When you respond quickly to questions, you reduce delays and help the team stay aligned. Ask the contractor to note drying equipment, demolition limits, and emergency actions in clear terms, and give the adjuster concise updates on progress.
If you keep one contact list and one document set, everyone can verify details without confusion. You’re part of a coordinated response, so speak directly, confirm messages in writing, and flag any change in conditions right away.
That steady exchange helps your claim stay organized, professional, and supported by accurate field data.
Scope Approval Timing
Scope approval timing can determine how quickly water damage restoration moves forward, because the contractor can’t fully proceed until the adjuster agrees on the repair plan and pricing.
You need tight coordination so your claim stays accurate and your team feels aligned. When the adjuster reviews moisture readings, demolition limits, and material replacement, you reduce delays and rework.
- Confirm the scope before demolition expands.
- Share photos, measurements, and dry-out logs.
- Request written approval for changes immediately.
- Track supplements when hidden damage appears.
If you stay proactive, you help your contractor document losses, protect coverage, and keep the restoration moving with confidence.
Clear timing also supports faster payment and fewer disputes.
Common Water Damage Claim Denials
Common water damage claims get denied when the insurer decides the loss wasn’t sudden, accidental, or properly documented.
You’ll also see denials when the policy excludes seepage, floodwater, or long-term leakage, because those losses usually fall outside standard coverage.
If you delay reporting, discard damaged materials too soon, or can’t show the source, the adjuster may question causation and limit approval.
Missing maintenance records, mold delays, or evidence of prior damage can also trigger a denial.
You protect yourself by notifying the carrier promptly, preserving photos, and keeping repair receipts, contractor notes, and moisture readings.
When you and your restoration team stay organized, you strengthen the claim file and reduce the chance that the insurer rejects your loss on technical grounds.
How Restoration Costs Get Approved
Once your insurer accepts the loss, it reviews the restoration estimate line by line to decide what it will pay. You help the process by giving clear photos, moisture readings, and a detailed scope from your contractor.
The adjuster compares labor, materials, equipment, and disposal charges against policy limits and local pricing. When items match the damage, they usually move forward quickly, and you stay in the loop as a trusted part of the claim team.
- Match each line item to visible damage.
- Document measurements, dates, and affected areas.
- Explain material and labor choices clearly.
- Respond fast to adjuster questions.
If the insurer needs more support, you can submit revised documentation and keep the approval moving.
Repairs That Must Wait for Approval
Before you start any permanent repairs, you need the insurer’s approval for work that changes the claim scope, cost, or documentation.
You should pause on structural rebuilds, finish replacements, cabinetry, flooring, drywall closure, and any hidden-damage work that could alter the estimate. If you replace materials before the adjuster records them, you may lose reimbursement for those items.
You also need approval before upgrading to different products, expanding demolition, or changing the drying plan into a repair plan.
Keep your contractor and adjuster aligned, and submit photos, measurements, and written notes before authorizing additional work. That way, you stay within policy rules and keep the claim file complete.
When everyone on your team knows the hold points, you reduce disputes and protect your coverage with confidence.
Preventing More Damage During Repairs
While you wait for approval on permanent repairs, you still need to keep the damaged area from getting worse. You can protect your claim and your home by controlling moisture, stabilizing materials, and documenting every step.
Keep your restoration team in sync so they can act within policy limits and prevent extra loss.
- Remove standing water, then dry surfaces with fans and dehumidifiers.
- Seal openings with temporary coverings to block rain, dust, and pests.
- Isolate unsalvageable materials so contamination doesn’t spread.
- Photograph conditions before and after each mitigation task.
You belong in a coordinated process where quick, documented action reduces risk, supports adjuster review, and keeps repairs moving without creating avoidable damage.
Frequently Asked Questions
How Long Does Water Damage Restoration Usually Take?
You’ll usually need 3–7 days for drying and 1–3 weeks for full restoration, depending on damage extent, materials, and repairs. You can speed things up by documenting promptly and coordinating contractors.
Can I Choose My Own Restoration Company?
Yes, you can usually choose your own restoration company, though your insurer may suggest one. You’ll want to verify licensing, document damage, and confirm coverage details so you stay aligned with your policy and your team.
Will Mold Removal Be Covered by Insurance?
Mold removal’s often covered if it results from a sudden, covered loss. You’ll need prompt documentation, mitigation, and policy review. If you delay, insurers may deny it, so coordinate quickly with your adjuster.
What if My Insurance Payout Is Less Than the Repair Estimate?
If your payout’s lower, you’ll need to cover the gap, negotiate with your adjuster, or submit supplemental documentation. You can also seek contractor itemization, challenge exclusions, and ask about depreciation recovery to reduce out-of-pocket costs.
Do I Need to Keep Damaged Items for Inspection?
Yes—you should keep damaged items for inspection, like preserving evidence at a scene. You’ll strengthen your claim, help adjusters verify losses, and avoid disputes. Photograph everything, then store items safely until your insurer approves disposal.
Conclusion
When water strikes, you act fast, document everything, and let the restoration process begin. You protect your claim by photographing damage, tracking every step, and following your policy terms. As in the tale of Noah, preparation and response can mean the difference between loss and recovery. If you stay organized and coordinate with your insurer, you can speed approvals, avoid denials, and restore your home with fewer surprises and less delay.