Like any investigation, mold remediation starts with evidence, not assumptions. Mold inspection before mold remediation helps map moisture, identify visible growth, and define affected materials before work begins. A visual check can confirm obvious colonies, while testing may be needed in concealed or disputed areas. Without this baseline, you risk missing contamination and misjudging the scope, and the next step depends on what the inspection reveals.
Key Takeaways
- Mold inspection is usually necessary because it defines the remediation scope and identifies affected materials and visible colonies.
- Moisture checks are essential since mold growth depends on active or recent water intrusion and hidden wet areas.
- Testing may be needed when visual inspection cannot determine the full contamination extent or hidden mold presence.
- Inspection helps separate salvageable from non-salvageable materials and prioritize high-risk areas for cleanup.
- If mold is small and isolated, a targeted inspection may be enough before moving directly to containment and remediation.
Do You Need a Mold Inspection Before Remediation?
Before you begin remediation, do you need a mold inspection? You do when you need a defined scope, a defensible plan, or confirmation that mold growth is present.
A mold inspection before mold remediation helps you identify affected materials, visible colonies, and likely contamination limits before work starts. You can use the findings to select containment, removal methods, and personal protective equipment.
If your property has recurring staining, odors, or post-occupancy concerns, an inspection gives you objective data instead of assumptions. It also helps you and your team align on the same conditions, so no one’s guessing about the work ahead.
In many cases, a qualified inspector documents conditions that guide remediation and reduce avoidable surprises during the project.
Why Moisture Checks Come First
Moisture checks come first because mold depends on an active or recent water source, and without finding that source, remediation can miss the cause and fail to prevent recurrence. You should confirm where moisture is entering, how long materials stayed wet, and whether conditions still support growth.
This step gives your team a shared baseline and keeps the plan focused on control, not guesswork.
- Measure surface and hidden moisture.
- Identify leaks, condensation, or seepage.
- Verify drying potential before work starts.
- Prioritize areas that can re-wet fast.
When you check moisture first, you reduce wasted effort, improve source control, and support a safer, more coordinated remediation process. That precision helps everyone involved move forward with confidence and clarity.
How Visual Checks Find Visible Mold
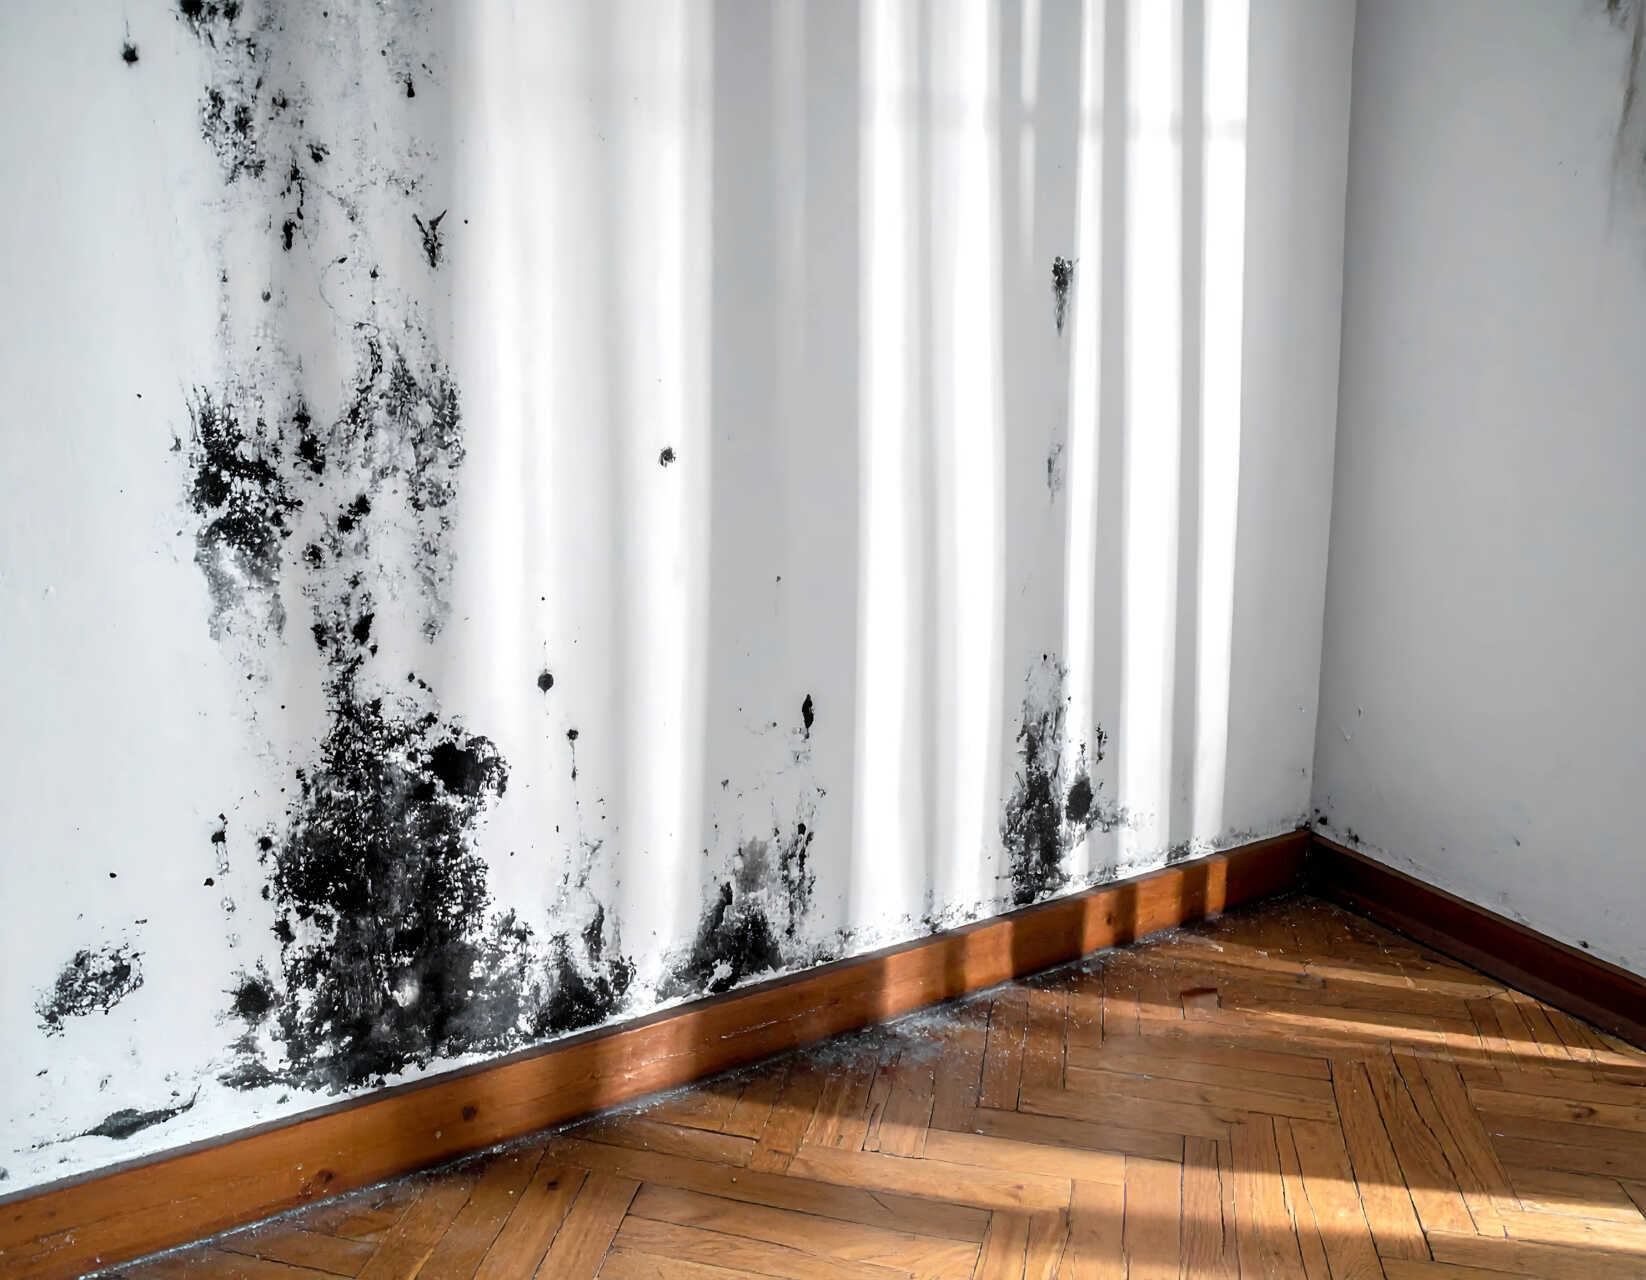
A visual check identifies visible mold by documenting staining, discoloration, surface growth, and material damage in each affected area.
You then trace the spread across walls, ceilings, floors, and hidden edges where colonies often start at seams or penetrations.
You inspect baseboards, HVAC registers, under sinks, and around windows for spotting, fuzz, or warping that signals active or past moisture exposure.
You compare affected and unaffected surfaces to define boundaries and guide safe containment.
You also note odor, peeling paint, and soft drywall, because these clues support a precise field assessment.
This process helps you and your team align on where remediation should begin, what materials need removal, and which spaces require closer protection during work.
When Mold Testing Is Needed
You should use mold testing when visual checks can’t define the full extent of visible growth or confirm whether contamination has spread beyond what you can see.
Testing also helps identify hidden contamination signs in materials or cavities that look intact.
Moisture checks can then confirm the source and support a remediation plan that targets the cause, not just the surface growth.
Visible Mold Extent
When visible mold covers a large area, the inspection should go beyond a basic visual review and include testing to define the full extent of contamination. You need this data so your remediation team can size the work correctly and protect everyone involved.
Testing helps you document the affected surfaces, compare zones, and avoid underestimating the scope.
- You confirm whether the growth is limited to one room or broader.
- You identify which materials need removal, cleaning, or containment.
- You support a remediation plan that matches the observed severity.
- You help your team share a clear, evidence-based scope.
With accurate measurements, you stay aligned with a careful, professional process, and you’re better positioned to move forward with confidence.
Hidden Contamination Signs
If the visual inspection shows staining, warping, musty odor, or moisture readings that don’t match the apparent damage, mold testing helps confirm whether contamination is hidden behind finishes or inside assemblies.
You use it when surface findings suggest more growth than you can see. Air, cavity, or bulk sampling can document contamination levels and support decisions about opening walls, ceilings, or floors.
You also gain a clearer scope when occupants report persistent odors or symptoms without obvious visible mold. Testing doesn’t replace inspection; it adds objective evidence when hidden colonies may be present in drywall, insulation, subflooring, or framing.
With this data, you and your remediation team can align on risk, prioritize affected areas, and plan work with confidence and shared expectations.
Moisture Source Confirmation
Moisture testing becomes important when the source of dampness isn’t obvious or when visible damage doesn’t fully explain the extent of mold growth. You need this confirmation before remediation because you can’t control contamination without stopping the water input.
A qualified inspector may use meters, infrared imaging, and air or surface testing to trace active leaks, vapor intrusion, or condensation patterns. That evidence helps you and your team choose the right repair scope and prevent recurrence.
- Identify hidden plumbing or roof failures.
- Differentiate old staining from active moisture.
- Verify whether humidity, drainage, or HVAC drives growth.
- Support a shared remediation plan with clear data.
How The Inspection Guides Remediation
You use the inspection to define the damage scope by identifying affected materials, visible growth, and hidden spread.
You then map the moisture source so you can target leaks, condensation, or drainage failures that sustain the contamination.
With that data, you set remediation priorities in the right sequence, focusing first on source control and the highest-risk areas.
Damage Scope Assessment
A thorough inspection defines the damage scope before remediation starts by identifying where mold is visible, where moisture remains, and which materials have been affected.
You get a clear boundary for removal, cleaning, and containment, so your team can work with confidence and consistency. The findings also show whether the damage is isolated or spread across connected areas, which helps you avoid underestimating the project.
- You identify affected surfaces and assemblies.
- You separate salvageable materials from non-salvageable ones.
- You set containment size based on confirmed impact.
- You document conditions so everyone follows the same plan.
This scope assessment keeps the process precise, reduces uncertainty, and helps you stay aligned with the remediation team from start to finish.
Moisture Source Mapping
Once the damage scope is clear, the inspection should map where water is entering, traveling, and lingering so the remediation plan targets the actual source, not just the visible mold.
You’ll get a clearer picture when the inspector checks roofs, plumbing, windows, slabs, HVAC lines, and hidden cavities with moisture meters, infrared imaging, and targeted probes. This lets you distinguish active intrusion from residual dampness and confirm whether the substrate can dry in place.
You also see how humidity, condensation, and drainage issues contribute to repeated contamination. When you share this data with your remediation team, everyone works from the same evidence and avoids guesswork.
That precision helps your project stay coordinated, limits unnecessary removal, and supports a cleaner, more reliable outcome for your space.
Remediation Priority Planning
With the inspection findings in hand, you can rank remediation tasks by risk, extent, and moisture activity so the crew addresses the most urgent conditions first.
You’ll use the data to assign labor, containment, and drying resources where they matter most, and you’ll avoid treating low-priority areas before active growth is controlled. That keeps your team aligned and efficient.
- Prioritize rooms with visible growth and elevated moisture.
- Isolate materials that spread spores or hold water.
- Schedule source repair before cleanup to prevent recontamination.
- Sequence clearance checks after each high-risk zone.
This plan lets you verify progress at each step, document decisions, and keep everyone working from the same field evidence.
When A Full Inspection Isn’t Necessary
When the mold problem is already isolated, visible, and supported by a clear moisture source, you may not need a full inspection before remediation.
You can often move straight to containment, source repair, and removal when the affected area is small, non-porous materials are limited, and no hidden spread is likely. A targeted visual assessment and moisture check usually give you enough data to define the work scope.
If the damage stays within one room, no HVAC contamination exists, and occupants report no broader symptoms, a full survey may add little value.
You still need documented conditions, but you can keep the process efficient and focused. This approach helps your team act with confidence, stay aligned, and avoid unnecessary delays.
Frequently Asked Questions
How Long Does a Mold Inspection Usually Take?
You’ll usually spend 1 to 3 hours on a mold inspection, depending on the property size, visible damage, moisture testing, and sample collection. Larger homes, hidden leaks, or lab testing can extend it.
Can I Stay Home During the Inspection?
Yes, you can usually stay home, though you’ll want to keep clear of sampled rooms. You’ll help the inspector move smoothly through the space, while they trace moisture, visible growth, and air clues precisely.
What Should I Do Before the Inspector Arrives?
Clear access to affected areas, stop cleaning or disturbing suspected mold, document leaks or stains, and gather maintenance records. You should also secure pets, ventilate if directed, and keep the inspector’s route unobstructed for accurate assessment.
Will Insurance Cover Mold Inspection Costs?
Usually, you’ll need to check your policy; coverage varies. Insurance may pay if a covered peril caused the mold. The squeaky wheel gets the grease: document damage, call adjusters, and verify exclusions carefully.
How Soon Can Remediation Start After Inspection?
You can usually start remediation within 24 to 72 hours after inspection, once you’ve reviewed findings, approved the scope, and scheduled contractors. If tests reveal hidden moisture, you’ll need fast drying or repairs first.
Wrap-Up
You need a mold inspection before remediation because it gives you a clear, objective map of the problem. Moisture checks expose the source, visual inspection identifies affected materials, and testing confirms hidden contamination when needed. Without that baseline, you’re steering like a ship without a compass, risking incomplete cleanup and recontamination. A proper inspection aligns your remediation plan with actual conditions, so you can act decisively, accurately, and with confidence.