You may not know that mold can start colonizing damp materials within 24 to 48 hours after water intrusion. You need to stop the source, isolate the area, and wear proper PPE before you disturb anything. Then you have to inspect hidden cavities, remove unsalvageable materials, and dry the structure completely, because incomplete drying can let contamination spread in ways you won’t see yet.
Key Takeaways
- Stop the water source immediately and remove standing water to limit mold growth.
- Wear gloves, eye protection, and a respirator before handling contaminated materials.
- Remove porous items soaked with water or sewage, since they can trap mold and contamination.
- Clean hard surfaces with detergent, then disinfect with an EPA-registered mold product and dry completely.
- Call a mold remediation professional if damage is large, hidden, or not dried within 24 to 48 hours.
Sewage Mold Cleanup Basics
When sewage backs up into a building, you need to treat the affected area as both a water-damage and biohazard event, because contaminated moisture can rapidly support mold growth while also exposing occupants to pathogens.
You should isolate the space, wear gloves, eye protection, and a respirator, then remove porous materials that absorbed sewage contamination.
Clean hard surfaces with detergent and a disinfectant labeled for biohazards, scrubbing until no residue remains.
Inspect hidden cavities, baseboards, and flooring for trapped moisture, because mold can colonize there quickly.
Keep occupants away until the area is dry, sanitized, and confirmed safe.
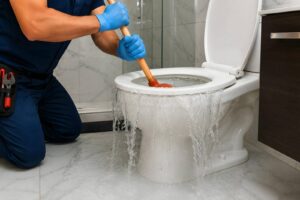
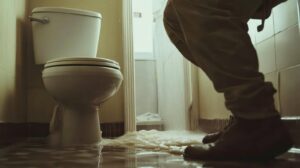
Stop Water Damage Fast
First, you need to stop the water at its source by shutting off the main supply or isolating the leak.
Then you should remove standing water and start drying affected areas immediately with airflow and dehumidification.
Quick control reduces moisture spread and limits conditions that support mold growth.
Stop The Source
Before you clean up mold, stop the water source immediately so the damage doesn’t continue spreading. You’ll protect your space by shutting off the main valve, closing fixture stops, and turning off the source equipment.
If a roof leak, burst pipe, or appliance failure caused the intrusion, isolate that area and tag the problem for repair.
Then perform a quick water damage assessment to identify active leaks, wet materials, and unsafe electrical conditions. This step supports mold prevention strategies because mold can begin growing within 24 to 48 hours.
Document what you find, notify building maintenance or your contractor, and confirm the source is fully controlled before you move on.
Your team’s fast response keeps the cleanup safe, coordinated, and effective.
Dry Affected Areas
Once you’ve stopped the source, dry the affected areas as quickly as possible to limit mold growth and structural damage. Open windows if outdoor conditions are dry, and run fans to improve air circulation across wet surfaces.
Position a dehumidifier near the most saturated zone; careful dehumidifier placement helps pull moisture from the air before it settles into drywall, framing, and flooring. Remove soaked rugs, cushions, and other porous materials that trap water. Lift baseboards if needed so hidden cavities can dry.
Check moisture levels daily with a meter, and keep equipment running until readings return to normal. You’re not just drying a room—you’re protecting your space and everyone who belongs in it.
Wear the Right Safety Gear
You should wear protective gloves before you handle any mold-contaminated materials, since skin contact can cause irritation.
Use respiratory protection rated for mold cleanup to reduce inhalation of spores and dust.
Cover your eyes and exposed skin with goggles, long sleeves, and pants to limit direct exposure.
Protective Gloves
Wear chemical-resistant gloves when handling moldy materials, cleaning solutions, and contaminated debris to protect your skin from irritation and exposure.
Choose glove types that match the task: disposable nitrile for light cleanup, reusable neoprene or butyl for wet scrubbing, and cut-resistant overgloves if sharp debris is present.
Select glove materials that resist puncture, moisture, and disinfectants, and check manufacturer ratings before you start.
Make sure the cuffs extend over your sleeves so contamination can’t wick inside.
Replace gloves if they tear, swell, or slip.
After use, remove them without touching the outer surface, then wash your hands thoroughly.
When you follow the same careful standard as the rest of your cleanup team, you help keep everyone safer and maintain a controlled work area.
Respiratory Protection
Respiratory protection is essential when mold cleanup disturbs spores, dust, and contaminated debris. You should wear a properly fitted N95 respirator for small cleanup tasks, or a higher-rated respirator if exposure is heavy.
Check the seal every time you put it on; if air leaks around the edges, it won’t protect you. Choose a mask that filters mold spores and other respiratory irritants, and replace it when it becomes damp, dirty, or hard to breathe through.
If you’re working with teammates, make sure everyone uses the same safety standard so no one is left unprotected. Don’t remove the respirator until you’ve left the cleanup area and washed your hands.
This gear helps you stay safe and confident during recovery.
Eye and Skin Coverage
Eye and skin exposure matters just as much as breathing protection during mold cleanup, since spores, dust, and contaminated debris can irritate or infect exposed tissue.
You should wear sealed eye protection, such as goggles, to block splashes and airborne particles. Choose protective clothing that covers your arms, legs, and neck, and use gloves that fit securely at the wrists.
If you’re working in a shared cleanup team, make sure everyone’s gear stays intact so nobody is left exposed. Change clothes after the job and wash them separately to reduce mold exposure.
Never rub your eyes or touch your face with contaminated gloves. This routine lowers skin irritation, supports safe work, and helps your crew stay focused, protected, and confident during cleanup.
Find Hidden Mold in Walls and Floors
Where can mold hide after water damage? You’ll often find it behind baseboards, under flooring, inside wall cavities, and around drywall seams.
Start hidden mold detection with a careful visual sweep for staining, bubbling paint, warped trim, and musty odor.
Then perform moisture assessment using a pin-type meter on walls, subfloors, and framing; compare readings between affected and dry areas.
Probe suspicious spots with a flashlight and borescope through small access points if needed.
Check near plumbing chases, exterior walls, and low areas where water pooled.
If readings stay elevated, map the damp zones and mark them for follow-up.
In our cleanup crew mindset, you’re not guessing—you’re confirming where mold can thrive so your next steps stay targeted and safe.
Remove Wet Materials You Can’t Save
Pull out any wet materials you can’t fully dry or salvage, starting with porous items like soaked drywall, insulation, carpet pad, and particleboard.
You should move fast, because trapped moisture keeps mold active and spreads damage.
Bag each piece as you remove it, and separate salvageable items from nonrecoverable waste so you don’t contaminate the rest of your space.
Cut damaged sections back to clean, dry edges, and remove fasteners that hold swollen material in place.
Use gloves, eye protection, and a respirator when handling debris.
Place waste in sealed bags or covered bins for proper wet material disposal.
Keep your team organized and consistent; when you work methodically, you protect the area, reduce odor, and give salvageable items the best chance to recover.
Clean and Disinfect Contaminated Surfaces
Clean all remaining hard surfaces with detergent and water to remove visible mold, dirt, and residue.
Then disinfect the affected areas with an appropriate biocidal solution labeled for mold cleanup, following the manufacturer’s contact time.
After treatment, dry the surfaces completely with ventilation and dehumidification to prevent regrowth.
Surface Cleaning Steps
Start by removing loose debris, then wash the contaminated surface with detergent and water to lift dirt, residue, and visible mold.
You’ll use surface cleaning techniques that match the material: scrub nonporous areas with a disposable cloth or brush, and rinse as needed so no film remains.
Choose effective cleaning solutions that break down grime without damaging the substrate, and apply them according to label directions.
Work from the cleanest section toward the dirtiest to avoid spreading contamination.
Replace cloths when they load up, and discard them after use.
If you’re cleaning with others, assign one person to washing and another to wiping so you can stay organized and thorough.
Dry the surface completely with air movement or clean towels before moving on.
Disinfecting Moldy Areas
Once the surface is visibly clean and dry, apply an EPA-registered disinfectant that’s labeled for mold and the specific material you’re treating.
You’ll get the best results when you match disinfectant options to the substrate, such as sealed wood, metal, or nonporous tile.
Read the label for contact time, dilution, and rinsing requirements, and keep the area closed to other people while you work.
Use a clean cloth or sprayer to fully wet the surface, then let the product remain in place for the full dwell time.
Different mold types can leave stubborn residues, so repeat treatment only if the label allows it.
Afterward, inspect for discoloration or odor, and document what you treated so your cleanup team stays aligned.
Safe Drying Practices
After disinfection, dry the treated area completely so moisture doesn’t support renewed mold growth. You’ll protect your space by combining dehumidifier use with strong airflow and steady monitoring.
Open windows when outdoor conditions are dry, and run fans to move air across walls, floors, and hidden corners. Check materials daily; if they stay damp, continue drying until surfaces feel fully dry and readings return to normal.
Ventilation importance matters because trapped humidity can undo your cleanup.
- Position a dehumidifier near the wettest zone.
- Aim fans to create cross-ventilation, not direct splashing.
- Remove porous items that still hold moisture.
You’re part of a careful cleanup crew when you keep the area dry, document conditions, and verify no condensation remains.
Dry the Structure Thoroughly
Before you clean up mold, you need to dry every wet material completely so you stop further growth and limit hidden damage.
Use dehumidification methods and steady air circulation to pull moisture from framing, subflooring, insulation, and wall cavities. Run fans to move humid air toward exhaust points, and keep indoor relative humidity below 60% if you can.
Check hidden spaces with a moisture meter; don’t trust surfaces that feel dry. Open access panels, remove soaked baseboards only if needed for airflow, and keep HVAC off if it spreads moisture.
You’re protecting your space and your team when you verify dryness before any cleaning begins. Continue monitoring until readings match nearby dry materials, because trapped moisture can restart mold within days.
Dispose of Contaminated Debris Safely
Dispose of contaminated debris immediately to keep mold spores from spreading during cleanup. You’ll protect your space by bagging soaked drywall, insulation, carpet, and porous items in heavy-duty plastic. Seal each bag tightly, label it, and keep it away from clean areas while you work.
Use disposal methods approved by your local waste service, and never mix contaminated debris with recyclables or household trash unless rules allow it.
- Wear gloves, eye protection, and a respirator while handling debris.
- Double-bag sharp or saturated materials to prevent tearing and leaks.
- Carry bags straight to the disposal point without setting them down.
This disciplined routine helps your crew stay organized and reduces cross-contamination. When you handle waste correctly, you’re supporting a safer, cleaner recovery for everyone in the home.
When to Call a Mold Remediation Pro
Call a mold remediation pro when the affected area is large, the contamination has spread into HVAC systems or wall cavities, or you can’t fully dry the space within 24 to 48 hours.
You should also call one if you notice mold growth indicators such as musty odor, staining, visible colonies, or recurring dampness after cleanup.
A professional assessment helps you identify hidden contamination, confirm the extent of damage, and choose the right containment method.
If you’re in a shared building, act quickly so you and your neighbors stay protected from airborne spread.
Don’t scrub porous materials blindly; a pro can test, isolate, and remove contaminated components safely.
When you bring in trained help, you’re choosing a faster, safer path back to a dry, healthy space.
Prevent Mold After Future Storm Damage
After a storm, you can limit mold growth by acting fast: dry wet materials within 24 to 48 hours, remove soaked porous items that can’t be fully dried, and clean hard surfaces with detergent and water.
These mold prevention tips work best when you plan ahead with storm preparedness and keep your home ready for fast response.
- Stock fans, dehumidifiers, gloves, and plastic sheeting before weather hits.
- Inspect roofs, gutters, seals, and drainage after every major storm.
- Document wet areas, then dry, disinfect, and monitor humidity below 60%.
You’ll protect your space and support the people you live with by keeping air moving, discarding damaged insulation, and checking hidden cavities behind walls.
If moisture lingers, call a pro quickly.
Frequently Asked Questions
How Long Can Mold Stay Hidden After Water Damage?
You can have hidden mold for weeks or months after water damage if moisture levels stay elevated; mold growth often starts within 24-48 hours. Check cavities, materials, and odors quickly, and inspect thoroughly.
Can I Test Air Quality Before Cleanup Starts?
Yes, you can test air quality before cleanup starts; you can sample spores, you can measure humidity, you can compare testing methods. You’ll know conditions, you’ll act confidently, and you’ll protect your home.
Will Homeowners Insurance Cover Mold Cleanup Costs?
Maybe—your homeowners policy might cover mold cleanup costs if the damage stems from a covered peril, but mold insurance coverage usually has policy limitations. Review exclusions, document losses, and ask your insurer for written clarification.
How Do I Know if Mold Has Spread Inside HVAC Ducts?
You’ll know by inspecting vents for musty odors, visible growth, or dust clumps—who wants hidden contamination? Schedule an HVAC inspection; if moisture or staining appears, you’ll likely need duct cleaning and remediation.
What Should I Do if Mold Keeps Returning After Cleanup?
You should find the moisture source, fix leaks, and schedule effective remediation. Then you’ll dry affected areas, replace contaminated materials, and follow mold prevention tips to keep humidity low and surfaces clean, helping you feel supported.
Summary
You’ve got to act fast, stay safe, and stop moisture to stop mold. Shut off water sources, suit up with proper PPE, and inspect hidden spaces in walls and floors. Remove soaked materials you can’t salvage, then dry the structure thoroughly with fans and dehumidifiers. Bag and dispose of contaminated debris carefully. If the damage is large or dampness lingers, call a mold remediation pro. Quick, clean, controlled cleanup prevents costly contamination.