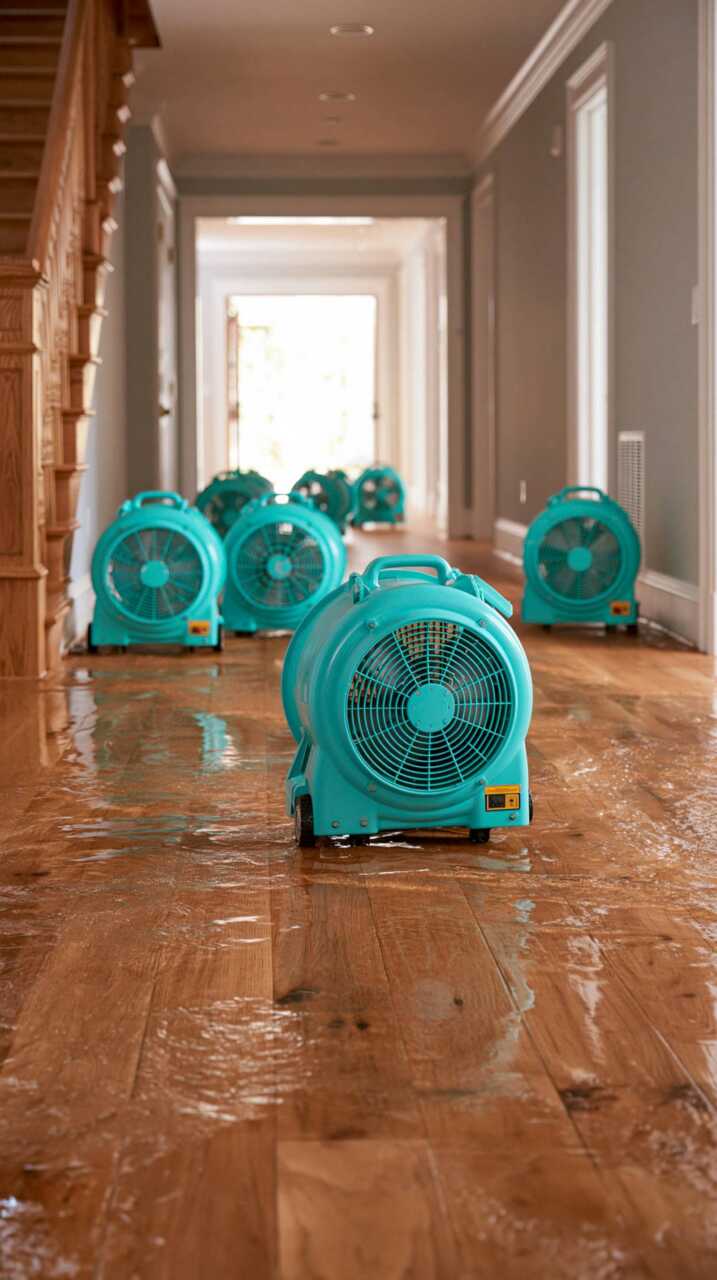
Structural Drying Steps are essential for removing hidden moisture and preventing long-term damage after water intrusion. Start by stopping the source of the water, extracting all standing water, and assessing affected areas for trapped moisture inside walls, floors, and structural cavities. Use professional air movers, dehumidifiers, and moisture monitoring tools to control airflow, reduce humidity, and verify that materials are drying properly. Before any repairs or rebuilding begin, calibrated moisture readings should confirm that the structure is fully dry. Following the correct drying process helps prevent mold growth, structural deterioration, and costly future repairs.
Key Takeaways
- Stop the water source immediately and document the affected areas.
- Remove all standing water with pumps, wet vacuums, and squeegees.
- Dry walls, floors, and hidden cavities using moisture checks and removed damaged materials.
- Lower humidity and increase airflow with dehumidifiers and fans.
- Verify everything is dry with moisture readings before rebuilding begins.
Shut Off the Water Source Immediately
The first step is to shut off the water source immediately to stop additional moisture intrusion and limit further structural damage. You should locate the main valve, close it fully, and verify the leak has stopped.
If the source is a fixture, isolate that branch valve instead. This emergency response protects your structure and gives your team a stable starting point for remediation.
In cases of active water damage, document the source, note affected rooms, and alert your insurance contact if needed. Use protective gear if you must enter a wet area, and avoid turning on electrical equipment near the leak.
Once the flow stops, you can coordinate the next drying tasks with confidence and keep your property recovery on track.
Remove Every Bit of Standing Water
You should use wet vacuums, weighted extractors, and squeegees to pull water from floors, mats, and low spots. Work from the outer edges toward the center so you don’t push moisture deeper into the structure.
Check hidden puddles under furniture, appliances, and baseboards, because standing water hazards include microbial growth, staining, and material breakdown.
If you’re part of a restoration team, coordinate water extraction techniques so everyone removes moisture in a systematic pass.
Keep an eye on safety, because wet surfaces can slip fast.
When you clear the visible water, you help the whole crew move forward together with a cleaner, drier space.
Dry Walls, Floors, and Cavities
Once standing water is gone, you need to dry walls, floors, and cavities fast to stop moisture from migrating deeper into the structure.
Use moisture detection to map wet areas behind baseboards, under trim, and inside wall cavities, so you can target the right materials.
Pull saturated carpets, padding, and damaged finishes, then inspect insulation considerations before deciding what stays or goes.
Set drying equipment directly on affected surfaces and open access points where hidden moisture lingers.
You’re protecting the assembly, not just the visible surface, so check framing, subfloors, and sheathing until readings drop to acceptable levels.
This focused work supports mold prevention and helps your crew restore the space with confidence, efficiency, and fewer surprises.
Lower Humidity and Increase Airflow
After you’ve dried the wet materials, turn your focus to the air itself. Lower humidity fast with a properly sized dehumidifier, and position it where return air can move freely.
Smart dehumidifier placement means keeping it away from walls and obstacles so moisture-laden air reaches the intake. Then boost air circulation with fans aimed across surfaces, not directly at one spot, to keep vapor moving toward the dehumidifier.
Close windows and exterior doors so you don’t pull in damp outdoor air. If your team is working in multiple rooms, coordinate airflow paths so each area supports the next.
You’re building a dry environment together, and steady humidity control helps the structure recover efficiently and consistently throughout the space.
Verify Dryness Before Rebuilding
Before you rebuild, verify that the structure is truly dry by checking moisture readings in framing, subflooring, drywall, and other affected materials. Use calibrated meters and compare each moisture measurement to unaffected areas or accepted dry standards.
Inspect hidden cavities, baseplates, and insulation, because trapped moisture can linger after surfaces feel dry. Document readings daily so you can track progress and adjust the restoration timeline with confidence.
If values stay elevated, keep drying equipment running and retest before closing walls. Confirm odor, staining, and tactile checks too, but trust data first.
When your crew knows the structure’s dry, you reduce rework, support safer repairs, and keep everyone on the same page through a clean, efficient rebuild.
Frequently Asked Questions
How Soon Should I Call My Insurance Company After Water Damage?
Call your insurance company immediately after water damage, ideally within 24 hours, so you can start insurance claims fast. You’ll protect your coverage, document losses, and connect with your adjuster while you still remember details.
Can Structural Drying Prevent Mold Growth Completely?
Like a race against hidden moisture, you can’t guarantee complete mold prevention, but you’ll greatly reduce risk with prompt drying techniques, inspection, and dehumidification. You’ll protect your property and join the many who act fast.
What Types of Equipment Are Used for Hidden Moisture Detection?
You’d use moisture sensors, thermal imaging cameras, pin meters, and hygrometers to find hidden dampness. These tools help you spot trapped water fast, confirm drying progress, and protect your team’s work from avoidable damage.
How Long Does It Usually Take to Dry a Water-Damaged Structure?
You’ll usually dry a water-damaged structure in 3–5 days, but drying factors, material type, and moisture levels can extend the drying timeline. You’ll need monitoring, airflow, and dehumidification to finish completely.
When Should Damaged Insulation Be Removed During Drying?
You should remove damaged insulation as soon as your insulation assessment shows it’s saturated, contaminated, or won’t dry within removal guidelines. Prompt removal lets you protect the assembly, control moisture, and keep your team aligned.
Wrap-Up
When you follow these five structural drying steps, you reduce losses and prevent hidden mold growth. Shut off the source, extract all standing water, dry cavities, then lower humidity and boost airflow until moisture readings confirm safe levels. For example, if a burst pipe soaks drywall overnight, you shouldn’t just paint over it; you need verified dry materials before rebuilding. That’s how you protect the structure, speed recovery, and avoid costly repeat damage.