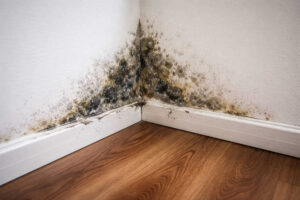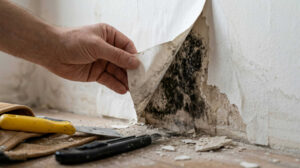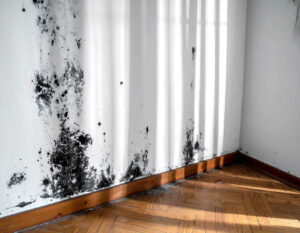

Storm Damage Repair requires a careful response to address both visible and hidden damage after severe weather events. Begin by assessing the affected areas, securing the property, and identifying moisture, contamination, and structural risks. Remove damaged materials that cannot be restored, clean and disinfect affected surfaces, and ensure walls, floors, and hidden spaces are thoroughly dried. Professional moisture detection and restoration methods help uncover problems beneath the surface, reduce the risk of mold growth, and protect your property from further damage.
Key Takeaways
- Inspect the damage safely, checking for leaks, broken windows, structural issues, and hazards like downed power lines.
- Remove standing water quickly, then dry walls, floors, and belongings with fans, dehumidifiers, and open ventilation.
- Check for hidden moisture, mold, and contaminated floodwater, and clean or remove affected materials promptly.
- Make temporary repairs first, such as tarping roofs and boarding windows, then complete structural and water damage restoration.
- Document all damage for insurance, follow local permit rules, and confirm repairs are stable and leak-free after completion.
Inspect Storm Damage and Shut Off the Water
Start by inspecting the damaged area for signs of flooding, leaks, broken pipes, and structural impact. Then shut off the main water supply if you suspect any plumbing damage.
Use a flashlight, gloves, and sturdy shoes, and document what you see for your storm assessment. Check ceilings, walls, floors, and utility lines for bulging, cracking, or active seepage.
If water has reached outlets or appliances, keep your distance and prioritize water safety before entering deeper. After you close the valve, verify that faucets stop flowing and listen for hidden leaks.
Alert everyone in your household so they avoid using taps until you’ve confirmed the system is secure. This first step helps you control risk, protect your home, and move forward with confidence as a team.
Remove Standing Water Fast
Remove standing water as quickly as possible to limit structural damage, mold growth, and electrical risk. You should move with your crew’s mindset: assess depth, choose pump options, and open drainage solutions that route water away from the building.
Use:
- Submersible pumps for deeper flooding
- Wet vacs for shallow pockets
- Squeegees to push water toward exits
- Hoses to discharge safely downhill
Check outlets, cords, and breakers before you start. Work from the lowest point to the highest, and keep clear pathways so you don’t trap water behind debris.
If storm runoff keeps entering, extend drainage solutions with sandbags or temporary channels. Monitor flow constantly, and stop only when the area is visibly clear and stable.
Dry Walls, Floors, and Belongings
Once the standing water is gone, dry walls, floors, and belongings immediately to stop moisture from soaking deeper into materials and causing mold, swelling, and staining.
You should open windows, run fans, and use dehumidifiers to move air across every affected surface. Remove wet rugs, cushions, and books, then spread items out so each piece can dry evenly.
Lift baseboards if needed and check whether drywall feels soft or warped; if it does, plan for drywall replacement. For floors, compare flooring options, and choose materials that can handle future moisture better.
Keep furniture off damp surfaces with blocks or plastic spacers. Work room by room, and stay organized so your team can track what’s drying, what’s salvageable, and what needs professional attention.
Check for Hidden Moisture and Mold
Check behind walls, under flooring, and inside cabinets for hidden moisture that can linger after visible water is gone. Use a moisture meter to confirm moisture detection in suspect areas, especially around baseboards, trim, and seams.
If readings stay elevated, open the space for airflow and keep fans running. You’ll protect your home and your crew by acting fast.
- Inspect paint bubbles and soft drywall.
- Smell for musty odors.
- Check insulation and subfloor edges.
- Photograph any mold growth for records.
For mold prevention, clean small patches with an appropriate cleaner and dry the area fully. If mold spreads, call a qualified professional.
Stay alert, trust your tools, and work together to keep your space safe and ready for repair.
Handle Sewage and Contaminated Water
Identify sewage or floodwater that has backed up into the home, and treat it as contaminated immediately.
Wear gloves, boots, eye protection, and a respirator if needed before you enter or start cleanup.
After removal, disinfect all affected surfaces and materials with an approved sanitizer to reduce health risks.
Identify Contaminated Water
After a storm, how do you know whether floodwater is unsafe? Check water sources first: if runoff came from sewers, streets, or overflowing drains, treat it as contaminated.
Look for contamination signs such as strong odors, oil sheen, discoloration, foam, dead animals, or floating debris. If the water touched toilets, washing machines, or basement floor drains, assume sewage exposure.
Stay in your lane: don’t guess based on clarity alone, because clear water can still carry pathogens.
- Trace the flood path.
- Note any backed-up plumbing.
- Watch for chemical smells.
- Mark any contact with waste.
When you identify these signs, you can plan cleanup more safely and protect your crew and neighbors.
Wear Protective Gear
When you handle sewage or contaminated floodwater, wear impermeable gloves, waterproof boots, long sleeves, long pants, and eye protection before you touch anything.
Choose safety equipment that fits snugly and stays intact during movement. Check protective clothing for tears, punctures, or loose seams before each use. Keep your skin covered from wrist to ankle, and tape cuffs if water could splash inside. Remove jewelry and watches so contamination can’t hide underneath.
If you’re working with a team, make sure everyone wears the same gear and understands the hazards. Replace wet or damaged items right away.
After the job, remove gear carefully to avoid contact with contaminated surfaces. You’re protecting yourself and helping the whole crew work safely together.
Disinfect Affected Areas
Once you’ve cleared away standing sewage or floodwater, clean and disinfect every surface it touched with a bleach solution or another EPA-approved disinfectant. You’re protecting your home and your crew when you move fast and stay consistent.
Work from cleanest to dirtiest, and keep children and pets out until the area dries.
- Wear gloves, boots, and eye protection.
- Scrub visible soil before you disinfect surfaces.
- Rinse hard surfaces if the product label requires it.
- Air-dry items, then sanitize belongings that can be saved.
Dispose of porous materials that stayed saturated, like drywall, insulation, and carpeting. Use separate buckets, rags, and mops for contaminated zones.
Wash hands often, and change clothes after cleanup. If sewage entered HVAC or wells, call licensed pros so your team stays safe and connected.
Repair Roof, Siding, and Windows
Start by inspecting the roof, siding, and windows for visible damage, including missing shingles, cracked panels, punctures, loose flashing, and broken seals.
Replace damaged shingles with matching materials, then secure roof flashing around chimneys, vents, and valleys so water can’t slip beneath layers.
Patch or replace warped siding sections, fastening them snugly to keep the wall assembly tight and aligned.
For windows, remove shattered glass carefully, install new panes or units, and renew window seals to restore a weather-resistant barrier.
Work methodically from the exterior inward, checking each repair for fit and stability.
If you’re unsure about structural damage, bring in a qualified contractor so your home stays safe and your repair crew stays coordinated and confident.
Finish Repairs and Prevent Future Damage
After the major repairs are complete, you should seal exposed joints, tighten loose fasteners, and replace damaged caulk around trim, vents, and penetrations to keep water out.
Next, inspect every repaired surface for gaps, warped material, and hidden moisture, then dry and disinfect any affected areas. You’re protecting your home and the people in it by finishing cleanly and verifying each detail.
- Repaint bare metal and wood.
- Test gutters and downspouts for flow.
- Record damage, repairs, and materials used.
- Schedule preventative maintenance before the next storm.
Check attic insulation, flashing, and seals after the first rain.
Add emergency preparedness supplies now so your household can respond faster next time.
When you finish with care, you strengthen your repairs and help your community stay ready together.
Frequently Asked Questions
How Do I Document Storm Damage for an Insurance Claim?
Photograph every damaged area, note dates, weather, and affected items, then record repair estimates and receipts. You’ll support your damage assessment and claim process by keeping organized, time-stamped evidence that clearly shows loss details.
When Should I Call an Emergency Restoration Company?
Call emergency restoration services immediately after flooding, structural damage, sewage, or active leaks. You’ll protect your home, speed the restoration timeline, and join others who act fast to limit loss and repair costs.
Can I Stay in My Home During Storm Damage Repairs?
You can stay if your home’s safe, but inspect for hazards first. Follow safety precautions, and if repairs involve leaks, mold, or structural damage, choose temporary accommodations. Staying should feel like shelter, not a gamble.
What Permits Are Needed for Major Storm Repairs?
You’ll need building, electrical, plumbing, and sometimes mechanical permits for major storm repairs. Check local permit types, then complete the application process with plans, photos, and contractor info. Your inspector’ll verify work meets code.
How Do I Choose a Reliable Storm Damage Contractor?
You’ll choose a reliable storm damage contractor like a captain choosing a steady crew: verify contractor qualifications, compare repair estimates, check licenses, insurance, and references, then trust the one who communicates clearly and fits your community.
Final Thoughts
You’ve inspected the damage, shut off the water, and cleared what you can see—but the real threat may still be hiding. If you act fast, dry every surface, and check for mold before it spreads, you can stop a bad storm from becoming a lasting disaster. Repair the roof, seal the gaps, and test everything again. Then you’re not just restoring your home—you’re making it harder for the next storm to win.