Home Repair Cleanup begins with a fast, organized response to limit damage before repairs can begin. Start by shutting off power if it is safe, documenting all affected areas, and removing standing water before moisture spreads into framing, walls, and finishes. Damaged materials that cannot be restored should be removed, followed by thorough structural drying and mold inspections to prevent future problems. Taking the proper steps before rebuilding helps protect your home, reduce repair costs, and prevent a small cleanup issue from becoming a much larger restoration challenge.
Key Takeaways
- Shut off power and water if safe, then evacuate if water rises or you smell gas.
- Photograph all damage before cleanup and keep dated records for insurance claims.
- Remove standing water with pumps or wet vacs, using GFCI outlets and protective gear.
- Dry rooms with fans and dehumidifiers, opening walls, carpet edges, and hidden cavities.
- Remove moldy drywall and flooring, disinfect surfaces, and repair with dry materials after moisture checks.
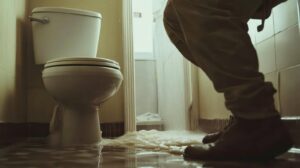
Stop the Water and Stay Safe
Before you start any cleanup, shut off the main water supply if it’s still flowing, then cut power to the affected area from the breaker panel only if you can reach it safely.
Next, wear insulated boots, gloves, and eye protection before you enter. If water is rising, leave the area and call emergency services.
Don’t touch outlets, appliances, or cords in standing water. Mark the wet zone so others stay out, and keep children and pets away.
If you smell gas, evacuate at once and contact the utility company. Use a flashlight, not candles, to inspect hazards.
Your water safety depends on quick, calm action, and your emergency preparedness helps protect everyone in your household.
Stay alert, follow local guidance, and only return when conditions are stable.
Document Flood Damage for Insurance Claims
You should photograph every damaged area, including walls, floors, furniture, appliances, and visible water lines, before you move or clean anything.
Keep a dated record of each image and note the room, damage type, and estimated extent so you can support your claim clearly.
Save all repair, cleanup, and replacement receipts, since insurers will use these costs to verify your loss.
Photograph All Damage
As soon as it’s safe to enter, photograph every area of flood damage in clear, well-lit shots that show both the full space and close-up details. Capture walls, floors, furniture, outlets, appliances, and visible staining before you move anything.
Include wide-angle images to establish context, then take targeted photos of warped materials, mud lines, and moisture pockets. Keep your camera steady and date-stamped if possible.
Back up files immediately to cloud storage or a drive so your insurance documentation stays secure. Label folders by room and damage type, and share copies with trusted emergency contacts who may help coordinate your claim.
If you can, photograph from the same spot twice, once horizontally and once vertically, to preserve a complete visual record for your insurer.
Record Repair Costs
Start logging every flood-related expense the moment repairs begin, because insurers typically require a clear paper trail to validate your claim. You should save receipts, contractor invoices, material quotes, equipment rentals, and mileage logs in one folder or spreadsheet.
Use cost tracking to separate emergency mitigation from permanent repairs, since adjusters often review categories differently. Add dates, vendor names, payment methods, and brief descriptions for each item.
If you’re coordinating with neighbors or a recovery group, consistent budgeting strategies help you compare costs and spot missing charges fast. Update totals daily, then back up digital copies in cloud storage and email yourself duplicates.
This disciplined recordkeeping strengthens your claim, reduces disputes, and helps your household stay organized while you rebuild.
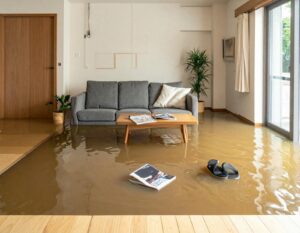
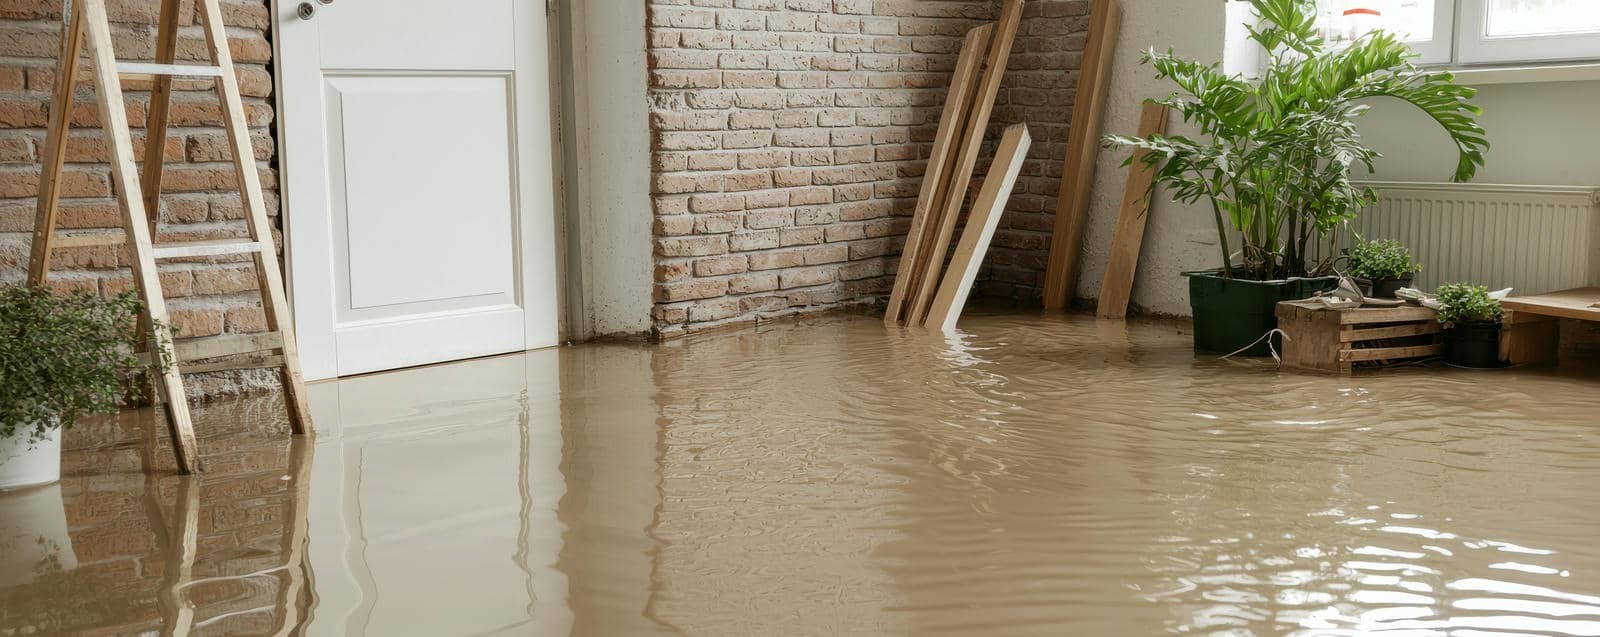
Get Rid of Standing Water Fast
First, locate and stop the water source so no more water enters the area.
Then use a sump pump, wet vacuum, or submersible pump right away to remove standing water as quickly as possible.
After the visible water is gone, dry hidden areas behind walls, under flooring, and inside cavities to prevent mold and structural damage.
Locate Water Source
Before you remove anything else, trace the water source and stop it at the point of entry. Then pump, mop, or wet-vac out standing water as quickly as you can.
Use water detection methods to inspect walls, floors, ceilings, and utility lines for fresh moisture, staining, or active drips. For leak identification, check supply valves, appliance connections, window seals, roof penetrations, and foundation cracks.
If you smell musty odors or hear dripping, follow the noise and mark the wet zone. Turn off the affected fixture or main valve if it’s safe and you know which one feeds the area.
Keep your team aligned by labeling the source, documenting the location, and sharing updates so everyone stays coordinated and confident while you work.
Use Pumps Quickly
With the water source identified and shut off, you need to remove standing water fast to limit further damage and mold growth.
Choose the right pump types for the depth and volume you’re handling. A submersible pump works well for deeper water, while a utility or transfer pump can move shallow water efficiently.
Keep hoses routed outdoors and away from foundations so you don’t send water back inside. If the water level is rising or you can’t keep up, call for emergency response support and bring in a higher-capacity unit.
Wear insulated boots and gloves, and plug equipment into GFCI outlets only. Stay alert for debris that can clog intake lines.
Fast pumping helps you protect the space and stay in control together.
Dry Hidden Areas
After you remove visible water, dry the hidden cavities that hold moisture and slow cleanup. Open wall access points, pull baseboards, and lift carpet edges so air reaches framing and subflooring.
Use box fans, dehumidifiers, and targeted drying techniques to move dry air through these spaces. Check behind cabinets, inside closets, under stairs, and around insulation for hidden moisture, then inspect daily with a moisture meter.
Replace wet insulation and damaged drywall only after readings drop to safe levels. Keep doors open when you can, and seal off rooms you’re not treating so airflow stays focused.
You’ll work better with a team that checks every concealed area, because thorough drying prevents odor, mold, and avoidable repairs later.
Tear Out Wet Drywall and Flooring
Start by removing any drywall and flooring that stayed wet long enough to absorb water, swell, or show signs of mold. You’ll protect the rest of the room by cutting drywall at least 12 inches above the waterline, then prying it off in clean sections.
Bag debris quickly and follow local drywall disposal rules so dust and contamination stay contained.
Next, make a flooring assessment: lift carpet, pad, vinyl, or damaged underlayment, and separate salvageable material from material that’s warped, delaminated, or stained.
Use a utility knife, pry bar, and gloves, and work methodically so you don’t damage adjacent trim or framing.
Stay organized, label piles, and keep your cleanup team moving with confidence.
Dry Out Walls, Floors, and Framing
You should remove residual wall moisture with air movers and dehumidifiers, and keep checking damp cavities with a moisture meter.
To dry floors, lift finishes where needed, increase airflow across the subfloor, and use drying mats or directed warm air on saturated materials.
Open wall and floor cavities around framing so air can move through studs and joists, which speeds drying and helps prevent hidden decay.
Wall Moisture Removal
Once the standing water is gone, remove trapped moisture from walls, floors, and framing as quickly as possible to limit mold growth and structural damage.
You should open wall cavities only where needed, then use moisture detection to verify wet sections before you dry them. Pull baseboards, drill small vent holes if required, and expose wall insulation that stayed saturated so you can replace it.
Position air movers and dehumidifiers to circulate dry air across framing members, but keep them off visibly wet surfaces.
Check studs, sill plates, and drywall edges daily with a meter. If readings stay high, keep drying and inspect for hidden leaks.
Work methodically with your crew, and you’ll protect the structure while helping everyone on site feel confident and included.
Floor Drying Methods
After wall cavities are open and trapped moisture is exposed, move to floor drying by stripping off wet coverings, lifting damaged underlayment, and checking the subfloor and joists with a moisture meter.
You’ll want to establish dehumidifier usage immediately, placing the unit in the driest adjacent room if the floor can’t be fully isolated. Keep air circulation steady with box fans aimed across the surface, not straight down, so moisture leaves the materials instead of redistributing.
Remove base trim only if needed to expose hidden wet edges. Mark readings, then compare them every few hours. If values stall, increase equipment capacity and open accessible panels.
You’re not doing this alone; every accurate reading helps your crew restore the floor system safely and efficiently.
Framing Airflow Tips
To dry wall cavities, floors, and framing efficiently, set up airflow so it moves moist air out of the structure and across wet surfaces without blasting debris into the assembly.
You should open cavities where needed, then place axial or centrifugal fans to create a clear path from damp zones to exhaust points. Use airflow management to keep air moving through joist bays, stud spaces, and subfloors.
Pair that with dehumidifiers so you lower humidity, not just circulate it. Remove baseboards or drill small access holes when framing techniques call for better internal drying.
Protect salvageable materials, check for trapped insulation, and monitor moisture daily. You’re not doing this alone; these steps help your crew work cleaner, faster, and with confidence.
Clean and Disinfect Flooded Surfaces
Start with a thorough washdown of every flood-affected surface using hot water and a heavy-duty detergent to remove mud, silt, and residues before disinfection.
As you complete your flood damage assessment, sort materials by finish and choose cleaners that match each surface.
Scrub hard surfaces with a stiff brush, rinse well, and wipe away standing water so your effective cleaning work isn’t diluted.
Then apply an EPA-registered disinfectant exactly as labeled, keeping the surface wet for the full contact time.
Wear gloves and eye protection, and ventilate the area so you can work safely with your team.
Rinse food-contact surfaces after disinfection.
Replace heavily contaminated porous items that can’t be fully sanitized.
Finish by inspecting edges, seams, and joints, because missed residue can undermine cleanup and delay your home’s recovery.
Check for Mold Growth Right Away
Once the surfaces are clean and disinfected, inspect them right away for mold growth, since mold can begin developing within 24 to 48 hours after flooding. You’re protecting your home and your crew’s peace of mind with fast mold identification.
Check hidden areas, including wall cavities, baseboards, insulation edges, and under flooring. Look for musty odors, discoloration, or fuzzy patches that signal contamination.
- Photograph every suspect spot for records.
- Mark damp materials so you can track them.
- Compare affected rooms to dry rooms to spot spread.
- Report findings promptly to support mold prevention.
Stay methodical; when you act early, you belong to the group that limits damage, reduces health risks, and keeps repair decisions grounded in evidence.
Remove Mold Before Repairs Begin
Before you rebuild, remove every trace of mold from the affected area so it doesn’t spread into clean materials or return after repairs.
Wear gloves, eye protection, and a respirator, then isolate the space with plastic sheeting to protect your crew and family.
Cut out porous materials that stayed wet too long, and scrub hard surfaces with detergent and water.
Use mold removal techniques that let you clean, dry, and inspect every hidden corner, including framing gaps and subfloors.
Run fans and dehumidifiers until moisture readings drop to safe levels.
Apply mold prevention strategies by fixing leaks, improving airflow, and keeping humidity low.
When you work methodically now, you help everyone feel confident that the home is truly ready for rebuilding.
Repair Flood Damage Safely
After the site is dry and mold-free, you can begin flood repairs by replacing damaged materials in a controlled order, starting with structural framing, then moving to insulation, drywall, flooring, and trim.
You should keep flood safety front and center: shut off power to affected circuits, wear gloves, boots, eye protection, and use clean tools. Work with a partner so you’re never alone in a risky area. Keep emergency kits nearby with water, a flashlight, first aid supplies, and a charged phone.
Follow this sequence:
- Remove loose debris.
- Inspect framing for stability.
- Install dry replacements.
- Test each area before moving on.
You’re rebuilding more than walls; you’re restoring your place in the home, one safe step at a time.
Prevent Future Flood Damage and Mold
To reduce the chance of another flood and stop mold before it starts, seal gaps where water can enter, extend downspouts away from the foundation, and keep grading sloped away from the house.
You should inspect window wells, sill plates, utility penetrations, and cracks after every storm. Use waterproof sealant, backer rod, and hydraulic cement where appropriate.
Install a sump pump with battery backup if your basement floods. Test the pump quarterly and clear its discharge line.
In humid rooms, run a dehumidifier and keep indoor humidity below 50%. Replace wet insulation, drywall, and carpet promptly, because hidden moisture feeds mold growth.
These flood prevention steps protect your home and help your household stay safe, dry, and confident together. Good mold prevention starts with routine checks and fast repairs.
Frequently Asked Questions
How Do I Know if Floodwater Contains Sewage?
You can’t know for sure without floodwater testing, but sewage indicators include foul odor, toilet paper, gray-brown color, and backed-up drains. If you see these, treat it as contaminated and avoid contact immediately.
Can I Salvage Appliances After Minor Flooding?
Yes, sometimes—you can salvage appliances after minor flooding. First, perform an appliance assessment: unplug, inspect, and dry thoroughly. Then review salvage options with a qualified technician; if water reached motors or controls, replace them.
What Supplies Do I Need for Emergency Flood Cleanup?
You’ll need gloves, boots, respirator, buckets, wet/dry vacuum, pump, mops, towels, plastic sheeting, disinfectant, and fans for water extraction. Add dehumidifier, trash bags, and bleach for mold prevention, so you belong to a safe cleanup crew.
How Long Should Insurance Claims Take After a Flood?
Usually, your claim should take days to weeks; if the insurance adjuster stalls, you’re in a leaky harbor. Track claim processing, submit documents fast, and ask for status updates so you don’t drift alone.
When Should I Call a Professional Water Damage Contractor?
You should call a professional water damage contractor immediately if flood damage reaches drywall, insulation, electrical systems, or HVAC. They’ll assess moisture fast, protect your restoration timeline, and help you avoid mold, structural issues, and delays.
To Sum Up
Flood cleanup is a race against time, so act fast, stay safe, and document every step. Shut off utilities, remove standing water, and tear out unsalvageable materials before hidden moisture turns into mold. Dry framing and cavities completely, then repair with flood-safe methods. Seal gaps, improve drainage, and keep indoor humidity below 50% to reduce repeat damage. If you move methodically, you’ll turn a soaked disaster into a controlled recovery.