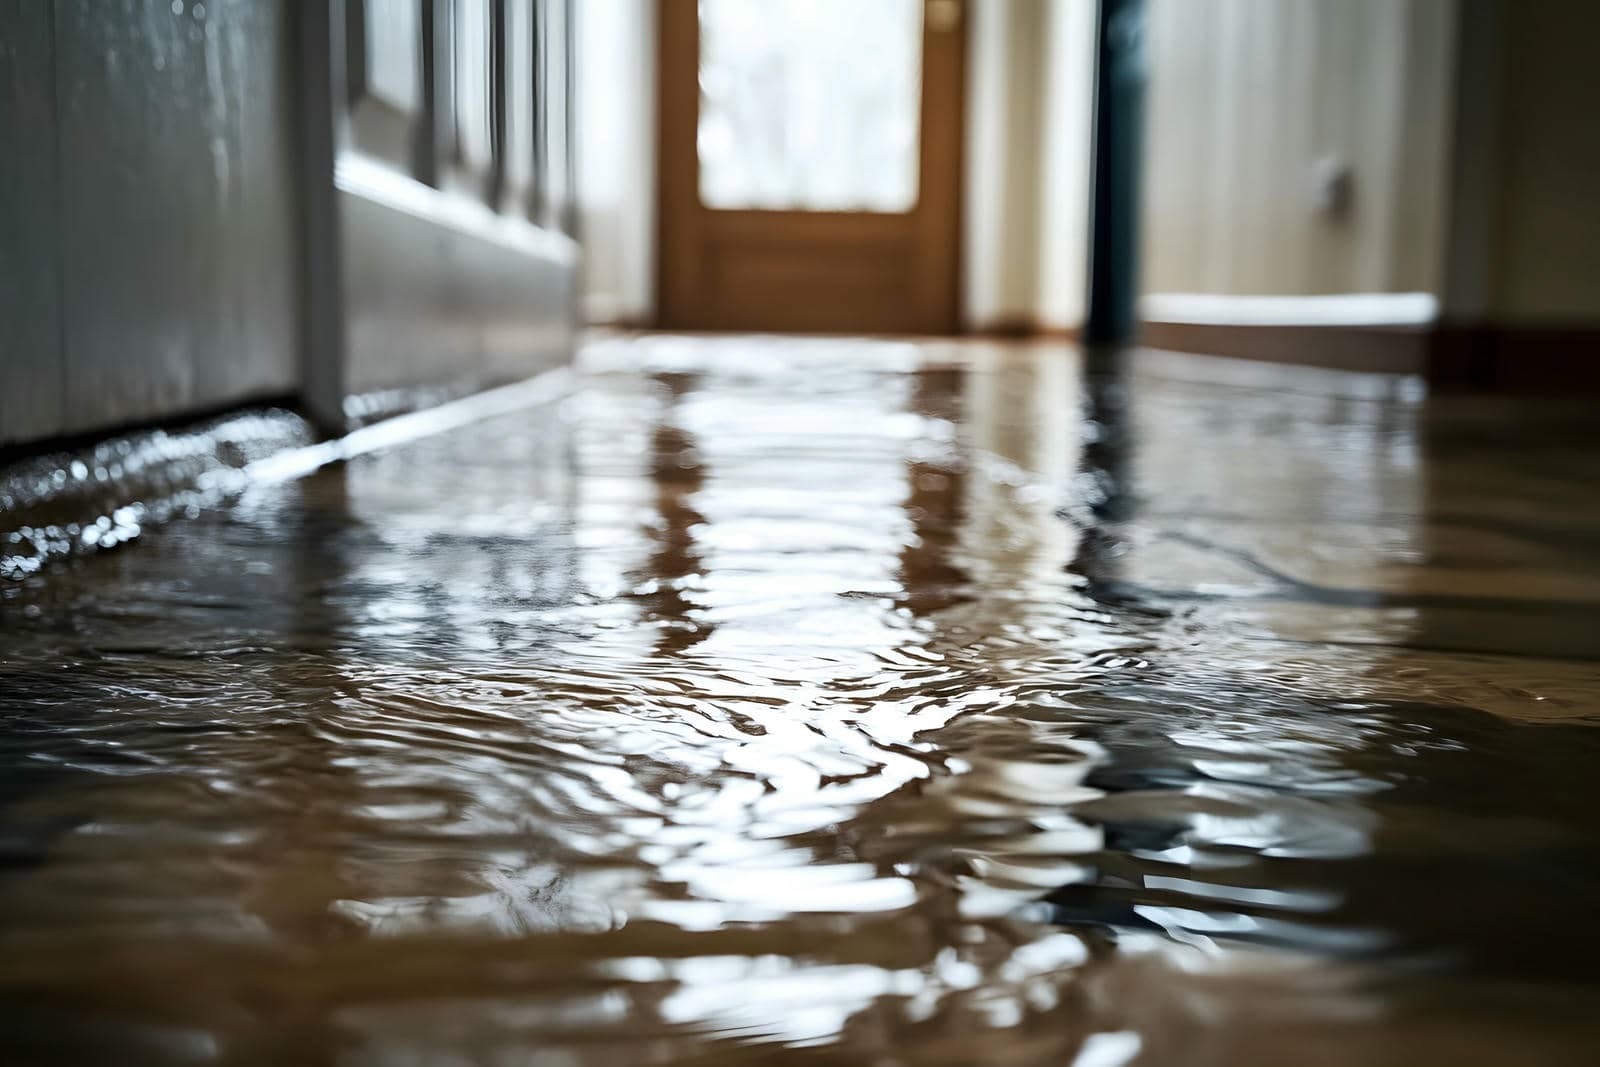
When water damage hits, it can feel like a room has been turned inside out. You should shut off the water and power first, then remove standing water with the right cleanup process equipment, dry every affected surface, and disinfect anything contaminated. If sewage is involved, or hidden moisture lingers behind walls, the cleanup gets more complex fast—and that’s where the next steps start to matter.
Key Takeaways
- Shut off the water source and electricity, then move people and valuables out of the affected area.
- Document the damage with photos and notes, and call a restoration professional if the spill is significant.
- Remove standing water using towels, a wet/dry vacuum, or a pump, wearing protective gear throughout.
- Dry the area thoroughly with fans and dehumidifiers, opening cabinets and removing baseboards for airflow.
- Clean and disinfect surfaces, inspect for mold or sewage contamination, and contact professionals if odors or damage persist.
What to Do Right After Water Damage
Act fast to limit the damage: shut off the water source if you can do so safely, cut power to affected areas, and move people and valuables away from standing water.
Then document the scene with clear photos and notes for insurance claims. Call your emergency response team or a trusted restoration pro right away so they can assess hazards, moisture spread, and structural risks.
Keep children and pets out of the area, and don’t touch wet outlets, appliances, or ceilings that may sag. If you can, open interior doors to improve air circulation without spreading contamination.
Save receipts for temporary repairs and lodging. You’re not handling this alone; quick, organized action helps you protect your home, support your claim, and get your space back safely.
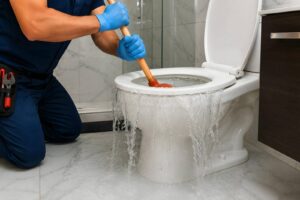
How to Remove Standing Water Safely
Start removing standing water as soon as it’s safe to do so, using the right equipment for the amount of water and the type of contamination present. Before you begin, shut off electricity to affected areas and wear protective gear.
For small pools, use mops, towels, or a wet/dry vacuum rated for water removal; for larger volumes, use a pump with proper hoses and discharge routing. Work from the outside in so you don’t spread contaminants. Dispose of contaminated water according to local rules, and keep children and pets away from the work zone.
Follow safe practices by checking for hidden hazards, unstable surfaces, and sharp debris. Move steadily, inspect your progress often, and pause if conditions change.
You’ve got this—careful removal now helps your team stay safer.
Dry Out Walls, Floors, and Furniture
Once the standing water is gone, you need to dry walls, floors, and furniture quickly to limit swelling, warping, and mold growth.
Start by removing baseboards, opening cabinets, and moving furniture away from damp surfaces so air can circulate. Use fans, dehumidifiers, and steady ventilation to support water extraction and keep moisture control on track.
Check drywall, trim, and wood flooring for cool, damp spots each day, because hidden moisture can linger behind surfaces. Lift rugs and cushions, and stand furniture on blocks so the underside dries too.
You’re not dealing with this alone; a careful drying routine helps your space recover faster and safer. Keep monitoring until readings stay normal, then restore items only when they’re fully dry and stable.
Why Sewage Water Needs Special Cleanup
Sewage water carries bacteria, viruses, and other pathogens that can put your health at risk, so you need to treat it as a hazardous contamination event.
You’ll need thorough disinfection because surface drying alone won’t eliminate the microbes or the residue they leave behind.
Use safe removal procedures with protective gear, controlled disposal, and verified sanitation to keep the area from becoming dangerous again.
Health Risks Explained
When contaminated water enters your home, it can introduce bacteria, viruses, parasites, and chemical pollutants that spread quickly through porous materials and indoor air. You’re not overreacting if you worry about it; these hazards can trigger bacterial growth in damp drywall, insulation, and flooring, while airborne droplets may worsen respiratory issues for anyone nearby.
You may notice irritation, nausea, fatigue, or worsening asthma-like symptoms as moisture lingers. The risk rises when families stay in affected rooms, because shared spaces let exposure continue and spread.
Contamination Requires Disinfection
Because sewage water carries far more than visible debris, it needs true disinfection, not just drying and deodorizing. You’re dealing with contamination sources such as bacteria, viruses, parasites, and organic waste that can cling to porous materials and spread through the space.
That’s why you need disinfection methods designed for biohazard conditions, not general cleaning products. Proper treatment targets microscopic residue on floors, walls, framing, and any surface touched by contaminated water.
When you address the contamination fully, you reduce odor, protect indoor air quality, and create a safer environment for everyone in your home. You deserve cleanup that restores confidence, not guesswork.
A careful, technical approach helps you move forward with clarity, knowing the space has been treated for what you can’t see.
Safe Removal Procedures
Safe removal starts with isolating the affected area, shutting off unsafe utilities, and using protective gear so you don’t spread contamination during cleanup.
You then remove sewage-soaked materials in sealed bags, keeping airflow controlled and pathways clear. Work from the least contaminated surfaces to the most affected, and wash tools after each use.
You’ll protect your home and your team by following preventive measures like HEPA filtration, frequent hand hygiene, and strict waste handling.
If water reached electrical systems, stop and call a licensed professional.
Keep emergency kits stocked with gloves, respirators, disinfectant, and heavy-duty bags so you can respond quickly.
When you follow these steps, you’re not alone—you’re building a safer space for everyone who shares it.
Clean and Disinfect Contaminated Surfaces
You should choose a disinfectant that’s safe for the affected material and effective against waterborne contaminants, then follow the label’s dilution, dwell time, and ventilation instructions.
Scrub every exposed surface with detergent and a clean brush or cloth so you remove residue, biofilm, and embedded debris before the disinfectant dries.
After treatment, rinse if the product requires it, then dry the area thoroughly to limit remaining moisture and reduce the risk of mold growth.
Choose Safe Disinfectants
After water damage, disinfecting contaminated surfaces with the right products helps prevent mold growth and reduce health risks.
You should choose EPA-registered disinfectants that match the material and contamination level in your space. Check labels for contact time, dilution ratios, and compatible surfaces so you can protect finishes while maintaining disinfectant effectiveness.
If you want eco-friendly options, look for hydrogen peroxide or quaternary ammonium products labeled for restoration work, but confirm they still meet sanitation standards.
Wear gloves and eye protection, and keep rooms ventilated while you work. You’ll also want to avoid mixing cleaners, since that can create hazardous fumes.
When you select safe, proven products, you’re taking a practical step that helps your home feel clean, controlled, and ready for the next phase.
Scrub All Affected Surfaces
Start by scrubbing every affected surface to remove visible dirt, silt, and residue before you disinfect. Use hot water and a detergent that matches the material, then apply steady pressure with scrub techniques that reach seams, corners, and textured areas.
For porous or damaged finishes, work in small sections so you can control surface cleaning without spreading contamination. Change cloths or brushes when they look soiled, and keep your strokes one direction to lift debris instead of driving it deeper.
You’re protecting your space and everyone who belongs in it by removing the film that shields microbes. After you finish, inspect each area under good light and repeat any spots that still look dull, stained, or gritty.
Rinse And Dry Thoroughly
Once the visible grime is gone, rinse each surface with clean water to remove detergent residue and loosened contamination, since leftover cleaner can interfere with disinfection and leave a film behind.
You’ll want to use fresh cloths, clean buckets, and controlled rinsing so you don’t spread debris back into the area.
After that, dry every surface thoroughly with towels, fans, and dehumidifiers. Strong water extraction helps reduce standing water, but moisture can still hide in seams, trim, and porous materials.
Keep checking those spots until they feel dry to the touch and the humidity stays stable. Good moisture control protects your space, limits microbial growth, and helps you feel confident that the cleanup is moving in the right direction.
Remove Damaged Materials Before Mold Spreads
Remove soaked drywall, insulation, carpet padding, baseboards, and any other porous materials that can’t be fully dried, because they can harbor mold within 24 to 48 hours. You’ll protect the space by moving quickly and keeping mold prevention front and center.
Cut away affected sections in clean, controlled lines, then bag them for proper material disposal so debris doesn’t spread through the home. Wear gloves, eye protection, and a respirator if dust is present. Keep removed items away from clean areas, and seal waste before carrying it out.
If structural wood is soft or swollen, leave it out until a professional evaluates it. By acting fast and following a clear routine, you help your home recover safely and keep your household included in the process.
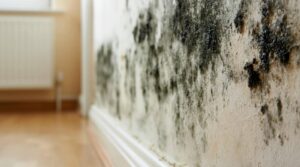
How to Check for Mold After Water Damage
After the water is out and damaged materials are gone, inspect the area for mold by looking for visible growth, musty odors, discoloration, and damp surfaces around walls, floors, trim, and hidden cavities.
You can use simple mold detection methods to confirm what your senses suggest and protect your space.
- Check baseboards, drywall seams, and subfloors with a flashlight.
- Feel for cool, damp spots that signal trapped moisture.
- Open closets, vents, and crawl spaces to find hidden growth.
- Photograph any suspect areas and note the date.
Stay calm—you’re not alone in this process. Quick, careful checks help you spot early trouble and support mold growth prevention by keeping surfaces dry and airflow steady.
If you notice repeated moisture, keep monitoring until everything feels fully dry.
When Mold Remediation Is Needed
If your inspection turns up visible mold, persistent musty odors, or damp materials that won’t dry out, you’ll likely need professional mold remediation.
You’re dealing with more than surface spotting: hidden colonies can spread behind drywall, under flooring, and inside insulation.
When moisture has lingered for 24 to 48 hours, mold growth can begin and compromise indoor air quality.
A remediation plan isolates affected areas, removes contaminated materials, and uses HEPA filtration to capture spores.
You’ll also want prevention strategies, like fixing leaks, lowering humidity, and drying wet spaces quickly, so your home feels safe again.
With the right response, you can protect your household, reduce recurring problems, and restore a clean, comfortable environment you can trust.
When to Call a Water Damage Restoration Team
Call a water damage restoration team when the damage goes beyond a small, contained spill or when moisture has reached walls, subfloors, insulation, or electrical systems. You’ll protect your home and your peace of mind by acting fast.
Water keeps spreading after you shut it off.
Odors, bubbling paint, or warped flooring appear.
You need moisture mapping, structural drying, or antimicrobial treatment.
You want help with insurance coverage and emergency services.
A qualified team uses extraction, dehumidification, and thermal monitoring to stop hidden damage before it worsens.
If you’re part of a community recovering from a leak, you’re not alone—these specialists work with you, document losses, and restore safe conditions efficiently.
Frequently Asked Questions
How Long Does Water Damage Cleanup Usually Take?
Usually, you’ll need 3–7 days for cleanup, but severe cases can take weeks. You’ll use drying techniques and mold prevention steps early, and your team’ll monitor moisture to keep your space safe and included.
Will My Insurance Cover Water Damage Restoration Costs?
Usually, your insurance policy can cover water damage restoration costs, but coverage limits, causes, and exclusions matter. You’ll want to review your policy, document damage, and contact your insurer promptly for guidance and belonging.
Can I Stay in My Home During the Cleanup Process?
You can stay if you’ve taken safety precautions and the damage is minor. If there’s electrical risk, contaminated water, or heavy drying equipment, you’ll need temporary relocation. Your restoration team’ll guide you.
What Equipment Do Professionals Use for Water Extraction?
You’ll see professionals use professional equipment like truck-mounted water extraction, portable vacuums, submersible pumps, and weighted wands—tools that sweep floodwater away like a tide, helping you feel secure, supported, and quickly back home.
How Much Does Water Damage Cleanup Typically Cost?
You’ll typically pay $1,200 to $5,000 for water damage cleanup, though cleanup factors like square footage, contamination, drying needs, and repairs can raise costs. You’re not alone—professionals will assess everything and restore your space.
Review
After water damage, you need to act fast: shut off the source, remove standing water, dry everything thoroughly, and disinfect contaminated surfaces. If sewage is involved, treat it as a health hazard and use professional cleanup. Check hidden spaces for moisture and mold, and remove damaged materials before they spread problems. I once saw a small leak turn into a full mold job in just 48 hours. If the damage is extensive, call a restoration team.