When you face water damage, evaluating the situation promptly, turning off utilities, and documenting the damage are vital steps. Each action you take can greatly impact the repair process and potential insurance claims. Knowing how to properly remove standing water and dry out affected areas is essential. But understanding how to prevent future damage is just as important. Let’s explore these ten tips to ensure your property remains safe and secure.
Key Takeaways
- Quickly identify the source of water to prevent further damage and address the issue effectively.
- Document all damage with photos and detailed notes for insurance claims and future reference.
- Prioritize safety by turning off utilities and wearing protective gear during cleanup and repairs.
- Use a submersible pump to remove water efficiently and check for hidden pockets to ensure thorough extraction.
- Assess structural integrity and employ proper repair techniques, consulting professionals for extensive damage.
Assess the Damage Promptly
When you discover water damage, it’s essential to evaluate the situation promptly to minimize further issues.
Begin your damage evaluation by identifying the source of the water. Is it a leak, flood, or condensation? Evaluating the severity is vital; check for wet spots, discoloration, or mold growth. Don’t forget to inspect affected materials like drywall, flooring, and furniture.
Next, take immediate action by documenting the damage with photos and notes, which can aid in insurance claims and future discussions.
If the damage is extensive, consider calling in professionals who specialize in water damage restoration, as they possess the right tools and expertise.
Your proactive approach protects your home and provides peace of mind.
Turn Off Utilities
When facing water damage, prioritizing safety is essential, so you should first turn off the utilities.
Locate the main shutoff for water, gas, and electricity to prevent further hazards.
Always follow local guidelines to ensure you’re taking the right steps in this critical situation.
Safety First
Before you begin any water damage repair efforts, it’s essential to prioritize safety by turning off your utilities. Start with the main power supply, as electrical hazards are common during water damage.
Don’t forget to shut off gas and water lines to prevent further issues. Equip yourself with personal protective gear, including gloves, goggles, and masks, to safeguard against contaminants and debris.
Confirm you have safety equipment on hand, like flashlights and a first aid kit, in case of emergencies. By taking these precautions, you create a safe work environment for yourself and anyone assisting you.
Locate Main Shutoff
With safety measures in place, it’s time to locate the main shutoff for your utilities. This step is essential to prevent further damage from your water supply. Here’s how to find it:
Inspect the basement: Look near the front foundation wall for the main valve; it’s often close to where the water line enters your home.
Check the crawl space: If you don’t have a basement, search for the main shutoff along the perimeter, typically near the water heater.
Locate the utility room: In some homes, the main valve is found in the utility room, often adjacent to the appliances.
Consult your home’s blueprints: If available, they can guide you directly to the main shutoff location.
Follow Local Guidelines
As you begin the water damage repair process, it’s crucial to follow local guidelines for turning off utilities, ensuring safety and preventing further complications.
First, check local regulations regarding utility shutoff procedures; they can vary by area. You might need to contact your utility companies for specific instructions. Turning off water, gas, and electricity can greatly reduce the risk of injury or additional damage.
Don’t hesitate to reach out to community resources for assistance; many local organizations offer support during these emergencies. Remember, you’re not alone in this process.
Document the Damage
Although you might feel overwhelmed after experiencing water damage, documenting it accurately is essential for both insurance claims and effective repairs.
Proper damage documentation helps you recall the event and provides the necessary evidence for your insurance company.
Here’s how to do it:
Take Photographic Evidence: Capture clear images of all affected areas, showing the extent of the damage.
List Damaged Items: Make a detailed inventory of damaged belongings, including their estimated values.
Record Dates and Times: Note when the damage occurred and any subsequent events, such as the response time of repair services.
Keep Receipts: Save all receipts related to repairs and temporary accommodations to support your claims.
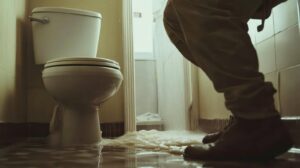
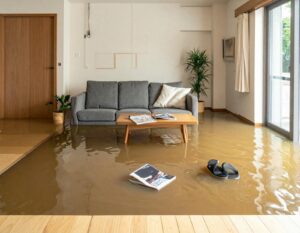
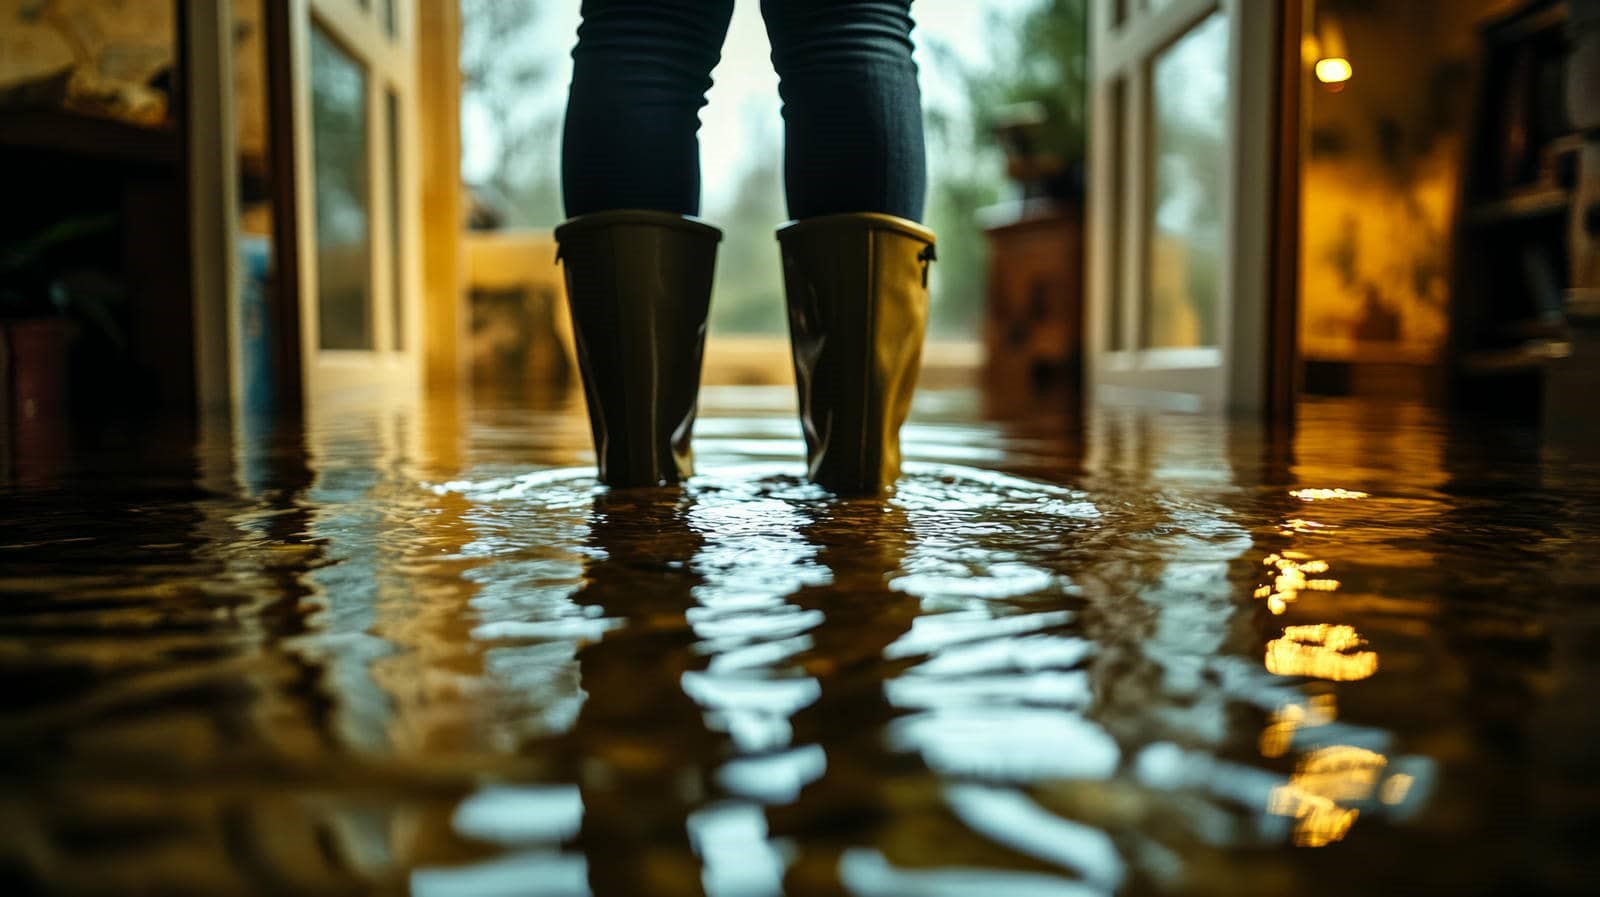
Remove Standing Water
Act quickly to remove standing water, as it can lead to further damage and mold growth if left unattended.
Start by evaluating the area and identifying the source of the water. Use a submersible pump for effective water extraction, ensuring it’s properly positioned to maximize efficiency. Familiarize yourself with the pump operation; following the manufacturer’s instructions will make the process smoother and safer.
Once the pump is in place, engage it and monitor the water level. If the amount of water is substantial, consider using additional pumps or a wet/dry vacuum for smaller areas.
Don’t forget to check for hidden pockets of water in corners or beneath furniture, as these can also contribute to mold growth.
After you’ve removed visible standing water, it’s essential to continue with your water damage repair efforts to mitigate any further issues.
You’ve got this—your diligence will pay off!
Dry Out Affected Areas
To effectively dry out affected areas after water damage, you need to employ a systematic approach. Start by ensuring thorough water extraction to remove any remaining moisture.
Then, implement the following drying techniques:
Use Dehumidifiers: Place dehumidifiers in the affected areas to absorb excess moisture from the air.
Increase Air Circulation: Open windows and use fans to promote airflow, which helps evaporate moisture more quickly.
Heat the Space: If safe, raise the temperature in the room to accelerate the drying process.
Remove Wet Materials: Take out soaked carpets, furniture, or drywall that can trap moisture and hinder drying.
Check for Mold Growth
After drying out the affected areas, you need to check for any mold growth.
Identifying the types of mold present is essential, as some can pose health risks.
Implementing effective prevention strategies will help you keep mold at bay and protect your home.
Identifying Mold Types
Identifying mold types is essential for effective water damage repair, as different molds can pose varying health risks and may require specific remediation strategies.
Familiarize yourself with common mold types and utilize mold identification techniques to ensure thorough assessment and remediation.
Here are four key molds to look out for:
Aspergillus – Often found in damp areas, it can cause respiratory issues.
Cladosporium – Commonly seen on textiles and wood, it may trigger allergies.
Stachybotrys – Also known as black mold, it’s highly toxic and requires immediate attention.
Penicillium – Generally appears on water-damaged materials and can exacerbate asthma.
Prevention Strategies
Once you’ve identified the mold types present in your space, the next step involves implementing effective prevention strategies to check for mold growth.
Start by applying waterproofing techniques to your walls and foundations, which can greatly reduce moisture levels. Make certain that any leaks are promptly repaired and consider installing drainage solutions around your property to divert water away.
Regularly inspect areas prone to dampness, like basements and crawl spaces, and keep them well-ventilated. Investing in a dehumidifier can also help maintain ideal humidity levels.
Remember, consistent monitoring and maintenance are key to preventing mold from returning, fostering a healthier environment for you and your loved ones.
Take these steps seriously, and you’ll create a mold-free space together.
Sanitize and Disinfect
While restoring your space from water damage, it’s crucial to prioritize sanitizing and disinfecting to prevent mold growth and eliminate harmful pathogens.
Here’s how you can effectively sanitize surfaces and disinfecting materials:
Clean Thoroughly: Start by removing any debris and dirt. Use a vacuum or broom to clear the area before applying any cleaning solutions.
Use Appropriate Cleaners: Choose EPA-approved disinfectants that are effective against waterborne pathogens. Always follow the manufacturer’s instructions for best results.
Focus on High-Touch Areas: Pay special attention to surfaces like doorknobs, light switches, and countertops, where germs accumulate easily.
Allow Proper Contact Time: After applying disinfectants, let them sit for the recommended time before wiping them away to ensure maximum effectiveness.
Repair Structural Damage
Repairing structural damage after water intrusion is essential for restoring your property’s integrity and safety. First, assess the extent of the damage. Look for signs of weakened beams, sagging floors, or compromised walls. Identifying these issues early on can save you from more significant problems down the road.
Next, employ effective repair techniques tailored to the specific damage. For minor issues, you might reinforce beams with steel brackets or replace sections of drywall. For more extensive damage, consider consulting a structural engineer to ensure the repairs maintain the building’s structural integrity.
Don’t overlook the importance of proper drying and ventilation during this process, as moisture can lead to mold and further deterioration.
Restore and Replace Affected Materials
To effectively restore and replace affected materials after water damage, you need to first identify which items can be salvaged and which must be discarded.
Proper material selection is essential to ensure that your home remains safe and comfortable. Here are four key items to evaluate:
Drywall: If it’s saturated and shows signs of mold, it needs replacing.
Flooring: Hard surfaces can often be cleaned, while carpets may require replacement if they retain moisture.
Insulation: Wet insulation loses its effectiveness and should be replaced to maintain energy efficiency.
Furniture: Assess for structural damage; wood can sometimes be restored using specific restoration techniques, while upholstered items may need to be discarded.
Implement Preventative Measures
Once you’ve restored and replaced the damaged materials, focusing on preventative measures can help you avoid future water damage.
Start by incorporating water-resistant materials in areas prone to moisture, such as bathrooms and basements. These materials enhance durability and provide peace of mind.
Next, schedule regular inspections of your property. Check for leaks, cracks, or signs of mold, and address any issues immediately to prevent escalation.
Inspect your roof, gutters, and drainage systems to verify they’re functioning properly.
Consider installing sump pumps or dehumidifiers to manage excess moisture effectively.
Finally, educate your household about water safety and maintenance practices. By fostering a proactive mindset, you’ll create a supportive environment that values long-term care and protection.
Taking these steps together helps you build resilience against water damage, ensuring a safe and welcoming home for everyone.
Frequently Asked Questions
How Long Does the Water Damage Repair Process Typically Take?
The repair timeline varies considerably; it typically ranges from a few days to several weeks. It largely depends on the damage severity, so evaluating the situation quickly will help you formulate an effective plan.
Can I File an Insurance Claim for Water Damage Repair?
Yes, you can file an insurance claim for water damage repair. Many homeowners don’t understand their insurance coverage. Familiarize yourself with the claim process to ensure you receive the compensation you deserve.
What Tools Are Essential for Water Damage Repair?
You’ll need essential tools like a moisture meter to detect hidden dampness and an extraction pump to remove excess water. These tools help ensure a thorough repair, making your space safe and comfortable again.
Should I Hire a Professional or Attempt Repairs Myself?
You should weigh your skills against the damage. If it’s minor, DIY repairs might suffice. For extensive issues, professional services ensure thoroughness and safety, giving you peace of mind and a job well done.
How Can I Prevent Future Water Damage in My Home?
To prevent future water damage, invest in waterproofing solutions and proper drainage systems. Think of your home as a fortress; strong defenses keep unwanted moisture at bay, ensuring your sanctuary remains safe and sound.
Conclusion
In the wake of a water disaster, think of your home as a ship weathering a storm. By taking swift action—assessing damage, removing water, and repairing structures—you’re not just patching up a vessel; you’re ensuring it sails smoothly again. Just as a captain learns from each tempest, implement preventative measures to guard against future storms. With care and diligence, your home will recover and thrive, standing strong like a lighthouse guiding you home.