If you find mold on your ceiling, it’s essential to approach removal methodically and safely. First, you’ll want to assess the extent of the growth before gathering your safety equipment. Each step is important for effective removal and long-term prevention. Ready to tackle this issue? Let’s explore the essential steps for a successful mold removal process.
Key Takeaways
- Conduct a visual inspection and use moisture meters to assess the extent of mold growth on the ceiling.
- Gather safety equipment, including gloves, goggles, and an N95 mask, before starting the removal process.
- Clear the area of furniture and seal it with plastic sheeting to prevent mold spread during cleaning.
- Apply a suitable mold removal solution, allowing it to sit before scrubbing the affected areas gently.
- Maintain humidity levels and inspect for leaks regularly to prevent future mold growth on the ceiling.
Assess the Extent of Mold Growth
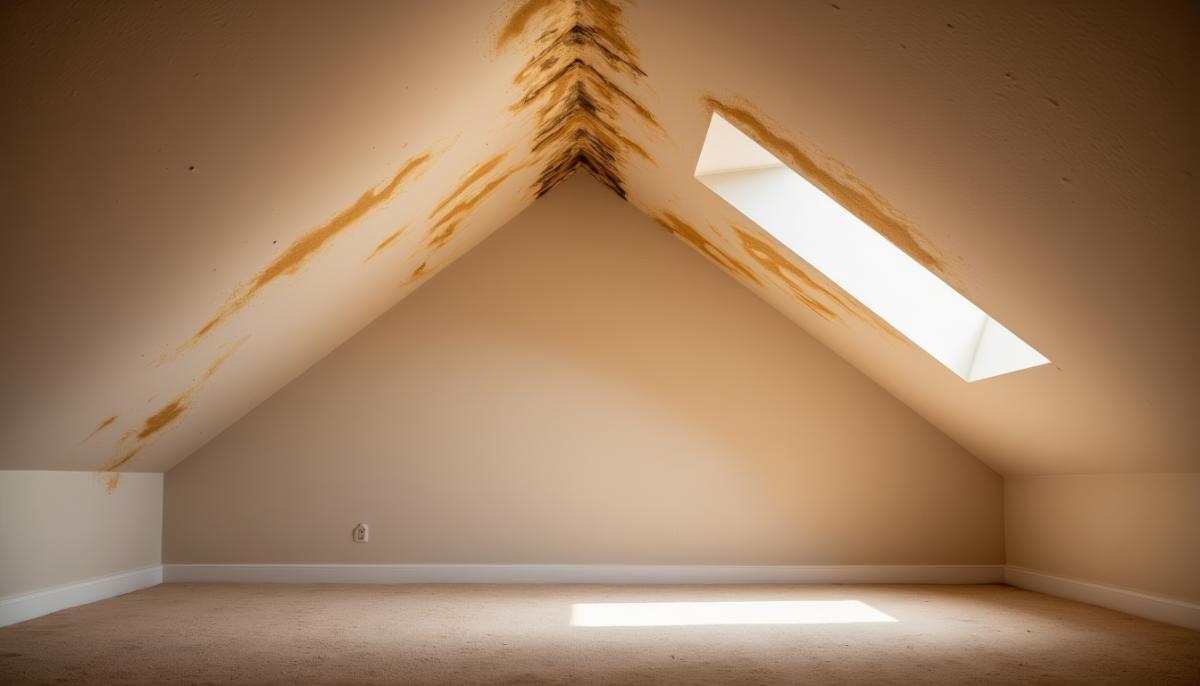
Before you tackle mold removal, it’s vital to evaluate the extent of mold growth in your ceiling. Start with mold inspection techniques like visual checks and moisture meters. Look for discoloration, stains, or any visible mold patches, as these can indicate underlying issues.
Pay attention to the ceiling material considerations—different materials react differently to mold. For instance, drywall may need replacement, while painted surfaces might only require cleaning.
Next, identify the areas most affected and estimate the size of the moldy sections. This evaluation helps you determine the necessary remediation steps and whether you can handle the task yourself or need professional help.
Gather Necessary Safety Equipment
Gathering the right safety equipment is crucial for a successful mold removal process. First, make certain you have appropriate safety gear, including gloves, goggles, and a protective mask. These items will shield your skin and eyes from mold spores and harmful substances. Opt for N95 or higher-rated respirators for effective respiratory protection against airborne particles.
Next, wear long sleeves and pants to minimize skin exposure. If the mold is extensive, consider using a full-body suit for added protection.
Don’t forget about the importance of ventilation; having a fan or air purifier can help keep the air clear while you work.
Lastly, keep a first aid kit nearby just in case, and confirm your workspace is well-lit.
Prepare the Area for Mold Removal
As you prepare the area for mold removal, it’s vital to clear out any furniture, decor, or personal items that might obstruct your access to the affected surfaces. This ensures efficiency and protects your belongings from contamination. Implementing effective area containment is essential; use plastic sheeting to seal off the work zone.
Next, emphasize the importance of ventilation. Open windows and doors to create airflow, reducing mold spores in the air.
Here’s a table to help you organize your preparation steps:
| Task | Purpose |
|---|---|
| Clear the area | Ensures easy access |
| Seal with plastic sheeting | Prevents mold spread |
| Improve ventilation | Reduces airborne spores |
Apply Mold Removal Solutions
Start by selecting an appropriate mold removal solution that suits your specific needs.
You’ll find various mold removal products available, so choose one that’s effective yet safe for your environment.
Follow these application techniques to ensure thorough removal:
Prepare the Solution: Mix the mold removal product according to the manufacturer’s instructions. Make sure you’re wearing gloves and a mask for protection.
Test a Small Area: Before full application, test the solution on a small, inconspicuous spot to check for any adverse reactions with your ceiling material.
Apply Evenly: Using a spray bottle or sponge, apply the solution evenly to the affected area.
Allow it to sit for the recommended time to kill the mold before scrubbing gently.
Prevent Future Mold Growth
To effectively prevent future mold growth, it’s crucial to address the conditions that promote its development.
Start by ensuring proper humidity control in your home; aim for indoor humidity levels between 30% and 60%. Use dehumidifiers in damp areas and regularly check for leaks or water damage.
Next, invest in long-term maintenance by inspecting your ceilings, roofs, and plumbing systems regularly. If you notice any signs of moisture or condensation, address them immediately.
Keep your living spaces well-ventilated by using exhaust fans in kitchens and bathrooms, and opening windows when the weather permits.
Additionally, consider using mold-resistant paints and materials during renovations.
Summary
By following these steps, you can reclaim your ceiling from mold’s unwelcome grasp. Imagine the relief of looking up at a clean, mold-free surface, breathing easy in a healthier home. Remember, safety’s your best ally—always wear protective gear and ventilate the area. After you’ve removed the mold, keep it at bay by managing humidity and ensuring proper airflow. With diligence, you’ll restore your ceiling and create a sanctuary free from mold’s persistent return.