Water Damage Restoration Cleanup requires a careful, step-by-step approach to protect your property and prevent further damage. Begin by assessing the affected area for safety hazards, wearing appropriate protective equipment, and stopping the source of the water when possible. Remove standing water and debris, clean and disinfect contaminated surfaces, and thoroughly dry the space before repairs or rebuilding begin. Following the correct restoration process helps prevent mold growth, structural issues, and hidden moisture problems that can compromise the safety and condition of your property.
Key Takeaways
- Assess safety first by checking for electrical, structural, and contamination hazards before entering the damaged area.
- Shut off the water or sewage source immediately to stop further damage and contamination.
- Remove standing water and debris quickly using pumps, wet vacs, and careful extraction methods.
- Disinfect all contaminated surfaces with EPA-registered cleaners, following label instructions closely.
- Dry the area thoroughly with dehumidifiers and fans, then remove unsalvageable materials and begin repairs.
Assess the Area and Stay Safe
Before you begin cleanup, assess the area for safety and identify any immediate hazards, including electrical risks, structural damage, and contaminated water.
You should verify that floors, ceilings, and walls remain stable before you enter deeper. Wear protective gloves, boots, and eye protection to support personal safety and reduce exposure.
Keep children and pets away from the affected space so you can work without interference. If the area has standing water, treat it as contaminated until you confirm otherwise.
Document visible damage, then remove only items you can handle safely. Ventilate the space when conditions allow, and monitor humidity to support mold prevention.
Trust your assessment, move deliberately, and pause if conditions change.
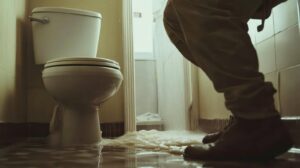
Shut Off the Sewage Source Immediately
If sewage is backing up or flowing into the area, shut off the source immediately to limit contamination and prevent further damage. You should close the main water valve, isolate the affected line, or stop the connected appliance if you can do so safely.
Contact your utility provider, plumber, or building manager right away so they can verify the shutdown and restore service correctly. This step reduces sewage contamination and helps protect everyone on site from health risks tied to bacteria, viruses, and airborne particles.
Keep clear communication with your team so no one reopens the system before it’s secured. If you’re part of a restoration crew, document the shutdown time and source for faster coordination and cleaner next steps.
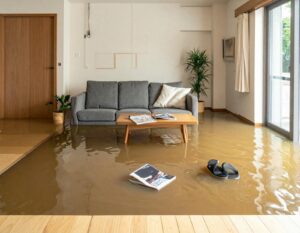
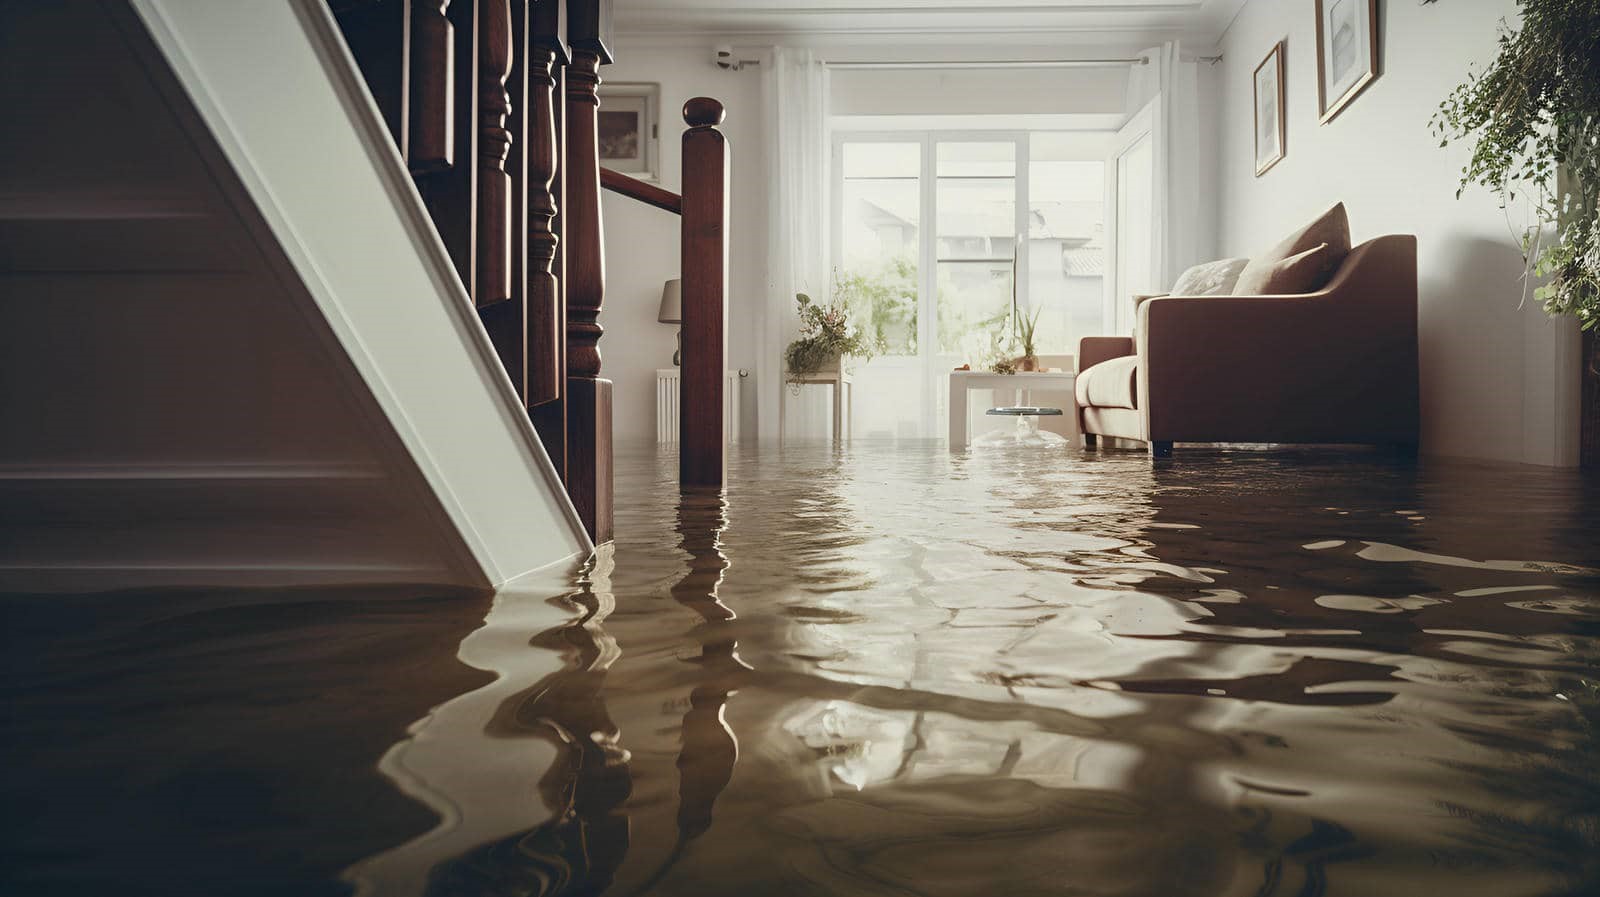
Remove Standing Water and Debris
Begin removing standing water as soon as the area is safe to enter, using a pump, wet vac, or other appropriate extraction equipment. You’ll speed recovery by performing water extraction methodically, starting at the lowest point and working toward exits.
Remove rugs, loose items, and soaked debris so you can access all affected surfaces. Bag and dispose of debris promptly to reduce obstruction and improve airflow for drying.
Check hidden pockets under furniture, in corners, and along baseboards, where water often lingers. Keep pathways clear so your team can move safely and work efficiently.
If water keeps returning, pause and verify the source is fully controlled. Consistent debris removal and thorough extraction help you protect the structure and stay aligned with the rest of your restoration crew.
Disinfect Contaminated Surfaces
Once standing water and debris are removed, disinfect all contaminated surfaces to reduce health risks and stop microbial growth. You should select cleaning agents matched to the contamination level and surface types, because porous and nonporous materials respond differently.
Use EPA-registered products when possible, and follow label dwell times exactly. Wear gloves and eye protection so you can work confidently and safely with your crew.
- Preclean surfaces before applying disinfectant.
- Test compatibility on a small area.
- Apply even coverage to full contact points.
- Rinse food-contact areas after treatment.
Focus on high-touch zones, corners, and seams where residue hides. If you stay methodical, you’ll protect shared spaces and support a clean, professional restoration outcome.
Dry the Area and Begin Repairs
With contaminated surfaces disinfected, focus on removing remaining moisture and restoring dry conditions as quickly as possible. You should run dehumidifiers, fans, and ventilation to improve airflow and support moisture control.
Check walls, subfloors, insulation, and cavities for hidden dampness, because trapped water can trigger mold and weaken materials. Remove damaged drywall, baseboards, flooring, and insulation that can’t be salvaged.
Then document the loss and plan repair techniques that match the damage level. Replace structural components only after readings confirm dryness.
During each step, keep the area clean, safe, and organized so your team can work efficiently and feel confident in the process.
When you restore finishes, use materials rated for wet-prone spaces to reduce future risk.
Frequently Asked Questions
How Do I Document Water Damage for My Insurance Claim?
Photograph all damage, keep affected items, and note dates, times, and causes. You should complete a damage assessment, then submit receipts, estimates, and logs during the claim process so you’re covered and supported.
When Should I Call a Professional Water Restoration Company?
Call a professional water restoration company immediately after flooding, sewage, or hidden moisture. You’ll get emergency response and damage assessment fast, protect your property, and join a team that handles cleanup safely and efficiently.
What Items Can Be Salvaged After Water Damage?
You can salvage salvageable items like sealed metal, glass, and hard plastics; think of restoration priorities as triage. You should discard soaked drywall, insulation, and porous fabrics, because they often trap contaminants and weaken fast.
How Long Does Water Damage Restoration Usually Take?
You’ll usually need 3–7 days, but your water damage timeline depends on restoration factors like water category, saturation depth, drying equipment, and hidden mold risks. You’re not alone; professionals can guide each step efficiently.
How Can I Prevent Future Water Damage in My Home?
Wouldn’t you rather stop leaks before they start? You can protect your home by sealing cracks, maintaining gutters, improving drainage solutions, and applying waterproofing techniques. These steps cut risk, save costs, and keep your home secure.
Recap
In the end, you can turn a hazardous cleanup into a controlled recovery when you assess the area, shut off the sewage source, remove standing water, disinfect contaminated surfaces, and dry the space completely. If you act quickly, the right tools seem to appear at the right moment, and that timing can make all the difference. Document each step, because that record helps you track progress, support repairs, and restore the space safely and efficiently.