When water lingers like a slow-moving threat, you need to act fast to keep mold from taking hold. You stop the source, dry the area within 24 to 48 hours, remove damaged materials, and contain the space to limit spore water damage spread. You also inspect hidden cavities, HEPA vacuum residue, and know when a pro is necessary. The right sequence can mean the difference between a clean recovery and a costly setback.
Key Takeaways
- Stop the sewage source, turn off HVAC, and isolate the area to prevent contaminated air and water from spreading.
- Remove wet materials quickly; discard porous items like drywall, carpet, and insulation that cannot be cleaned and dried.
- Dry all remaining surfaces within 24–48 hours using fans, dehumidifiers, open windows, and moisture meter checks.
- Clean hard surfaces with scrubbing, rinsing, disinfection, and HEPA vacuuming while wearing gloves, eye protection, and an N95 respirator.
- Call a mold professional if mold returns, the area is large, or contamination affects walls, ceilings, or HVAC systems.
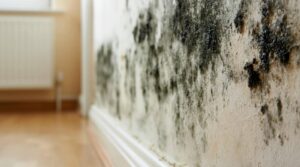
Understand Sewage Mold Risks
When sewage backs up into a home, it can introduce mold growth along with bacteria, viruses, and other contaminants. You face sewage contamination that can soak porous materials, create damp pockets, and elevate mold exposure within 24 to 48 hours.
You may notice musty odors, discoloration, or swollen drywall, but hidden colonies often spread behind walls and under flooring. Because sewage carries pathogens, you shouldn’t treat this as a standard leak.
You need to protect your household by limiting contact, keeping children and pets away, and recognizing that contaminated moisture can trigger respiratory irritation, allergy symptoms, and structural decay.
When you understand these risks, you can make informed cleanup decisions and work with a team that treats your safety and recovery as a shared priority.
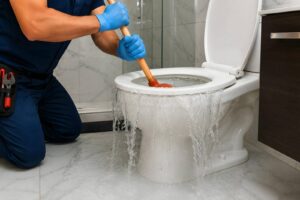
Stop the Sewage Water Fast
Shut off the sewage source immediately to limit further contamination and mold growth. You need rapid response, because every minute lets pathogens spread and raises cleanup complexity.
If you can’t isolate the line safely, call a licensed plumber or emergency restoration team right away. Keep everyone out of the affected zone and post clear warnings so your household stays protected.
Use sewage containment barriers, such as plastic sheeting or absorbent socks, to stop spread into adjoining rooms. Turn off HVAC if it can move contaminated air through your home.
Remove pets, children, and any exposed food or porous items from the area. Document the damage for your records, then coordinate with trained professionals who can stabilize the site fast and help your community recover together.
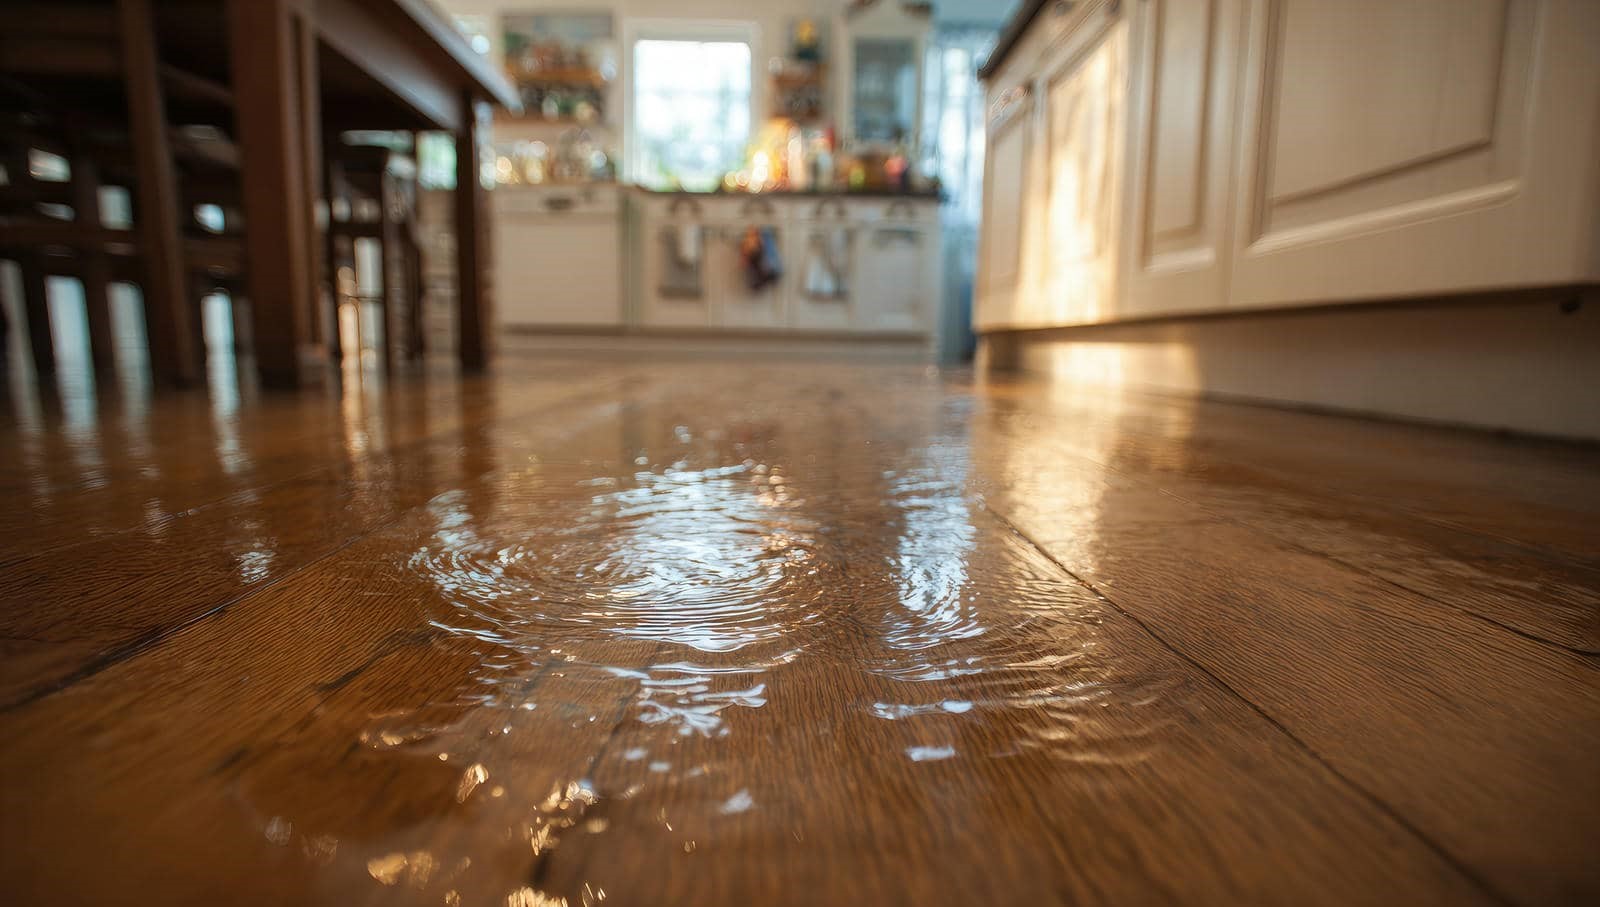
Dry the Affected Area Completely
Once the contaminated water is contained, you need to dry every affected surface fast and thoroughly to stop mold from taking hold. Move air with fans, open windows if outdoor conditions help, and use dehumidifiers to pull water from the air.
Focus on hidden damp spots behind baseboards, under cabinets, and inside wall cavities, because trapped humidity keeps spores active. Check your progress with a moisture meter so you can verify that materials are truly dry, not just surface-dry.
Good ventilation techniques support faster evaporation, while steady moisture control keeps levels from rebounding overnight. Work methodically, and stay with the team’s plan so everyone’s effort counts.
When you keep the area dry, you give your space the best chance to recover cleanly and safely.
Remove Contaminated Materials Safely
Remove and discard any porous materials that can’t be fully cleaned and dried, such as saturated drywall, insulation, carpet, carpet padding, and heavily damaged ceiling tiles. You’ll protect your space by treating these items as contaminated and removing them promptly.
Use mold removal techniques that focus on source elimination, not surface masking. Bag debris in sturdy plastic, seal it tightly, and move it out with safe disposal practices. Wear gloves, an N95 respirator, and eye protection while you work.
- Cut materials into manageable sections
- Keep pieces dampened to limit dust
- Load waste directly into bags
- Clean tools after each use
You’re not alone in this step; many teams use the same method to keep cleanup efficient, controlled, and compliant.
Seal Off the Area to Stop Spore Spread
After removing contaminated materials, you need to isolate the work zone so disturbed spores don’t spread to clean areas.
Close doors, hang 6-mil plastic sheeting, and tape every seam to form a tight barrier. If you can, create a zipper entrance so you can move in and out without tearing the seal.
Turn off HVAC supply and return vents near the site, and block gaps around registers, windows, and door frames.
Keep the space under negative pressure with a HEPA air scrubber when possible; that helps protect air quality for everyone in your home.
Post clear signs so your household knows to stay out.
These mold prevention tips reduce cross-contamination, limit cleanup scope, and help your team work safely together.
Clean and Disinfect Hard Surfaces
Hard, nonporous surfaces should be scrubbed, rinsed, and disinfected as soon as the area is contained. You can use proven mold removal techniques to protect your home and help your crew move with confidence.
Work from clean areas to dirty ones, and use separate cloths for each step.
- Scrub visible growth with detergent and water.
- Rinse thoroughly to remove residue.
- Choose disinfectant choices labeled for mold on hard surfaces.
- Dry surfaces completely to limit regrowth.
Keep ventilation steady, wear gloves and eye protection, and follow label directions exactly.
You’ll get the best results when you remove all surface debris before disinfecting. Stay consistent, because careful cleaning helps your space feel safe, controlled, and ready for the next phase of recovery.
Check Walls and Floors for Hidden Mold
Next, inspect walls and floors for hidden mold by checking behind baseboards, under flooring, inside wall cavities, and along seams where moisture can collect.
Use mold detection methods such as visual checks, a moisture meter, and careful probing of soft or swollen materials. If you spot staining, warping, or a musty odor, treat the area as suspect and document it before disturbing anything.
Cut away damaged sections only when needed, and keep moisture control in place by drying the space quickly and fixing the source of water intrusion.
You’re not handling this alone; a careful inspection helps your team catch growth early, limit spread, and protect the structure.
Focus on concealed areas, because hidden mold often signals ongoing dampness that needs correction.
HEPA Vacuum Remaining Mold Spores
You can use a HEPA vacuum to remove loose mold spores from dry, intact surfaces without redistributing fine particles into the air.
You should wear PPE and verify that the vacuum seals and filter are intact, since leaks can contaminate the cleanup area.
After vacuuming, keep the area contained and dispose of the collected debris according to your containment plan.
HEPA Vacuum Safety
HEPA vacuums help capture fine mold spores that standard vacuums can recirculate, but they don’t eliminate all contamination by themselves. You need tight controls so your cleanup stays safe and consistent with the team’s standards.
- Wear a fitted respirator and gloves.
- Check HEPA filters before each use.
- Keep vacuum maintenance on schedule.
- Seal and dispose of collected debris promptly.
Use slow, overlapping passes to limit dust bursts, and keep the hose, wand, and canister intact so leaks don’t spread particles.
If the unit smells musty, loses suction, or shows damaged seals, stop and service it before continuing. Your goal is to protect your space, your crew, and your confidence during cleanup.
Removing Loose Spores
Sweep out the remaining loose spores with a HEPA vacuum after larger debris is removed, focusing on seams, corners, baseboards, and other dust-trap areas.
You’ll reduce surface loading by moving slowly and overlapping each pass so the filter can capture fine particles. Check your nozzle for dust buildup and empty the unit before it overloads.
During mold spore identification, note any discoloration, residue, or hidden dust that may signal missed contamination. Use a clean attachment for each zone so you don’t redistribute material.
After vacuuming, inspect nearby materials under bright light and repeat as needed. These prevention techniques help you keep the cleaned area within your community of safe, healthy spaces and lower the chance of recurrent growth.
Post-Cleanup Containment
Once the visible debris is gone, use a HEPA vacuum to collect remaining mold spores from seams, corners, baseboards, and other dust-prone surfaces. You keep dust contained and reduce recolonization risk.
Use containment strategies that limit airflow, isolate the work zone, and protect clean areas.
- Vacuum slowly with overlapping passes.
- Replace or clean filters as directed.
- Seal and bag collected debris immediately.
- Perform a post cleanup inspection for residue.
Focus on edges, behind trim, and inside cabinet joints where spores settle.
If you share the space with others, keep traffic low until surfaces are dry and verified clean. This step helps your team stay aligned, protects the room, and supports a safer return to normal use.
When to Call a Mold Pro
If you see visible mold growth that keeps returning after cleanup, you should call a mold pro.
You should also get help when the affected area is large or the water damage has spread into walls, ceilings, or HVAC components.
A pro can assess health and safety risks, contain the contamination, and use proper remediation methods.
Visible Mold Growth
Check walls, ceilings, and baseboards for patchy discoloration.
Look for fuzzy, slimy, or powdery textures.
Note recurring spots after drying or cleaning.
Document the size and location before contacting a specialist.
If the growth covers a large area or keeps reappearing, you’re dealing with more than a cosmetic issue.
A trained technician can match the cleanup plan to the contamination level and your space.
Health And Safety Risks
When mold growth follows water damage, the main concern isn’t just appearance—it’s exposure risk. You can develop mold allergies, respiratory issues, headaches, or eye irritation after brief contact with contaminated dust.
If you’re immunocompromised, pregnant, or have asthma, your immune response may be stronger and symptoms can escalate fast.
Heavy growth, hidden wall moisture, or a musty smell that returns after cleaning means the problem likely extends beyond surface cleanup. In those cases, you should call a mold pro.
Certified remediation teams can identify the source, contain spores, and limit toxic exposure while protecting your household.
You don’t have to handle this alone; getting expert help keeps your space safer and helps your home get back to normal.
Prevent Mold After Sewage Backup
Sewage backups introduce contaminated water and organic debris that can drive rapid mold growth, so you need to remove the waste, dry affected materials, and disinfect the area as soon as possible.
You’ll protect your space best when you act fast and follow proven mold prevention strategies. Wear PPE, keep others out, and ventilate the area while you work.
- Shut off water and electricity if needed.
- Remove porous items that stayed wet.
- Scrub hard surfaces with EPA-approved disinfectant.
- Run dehumidifiers until humidity drops below 60%.
These sewage backup precautions help stop spores from colonizing hidden cavities and framing.
If saturation lasted more than 24 hours, arrange professional drying and inspection.
When you stay methodical, you support a healthier home and keep your community’s shared standards high.
Frequently Asked Questions
How Long Does Mold Cleanup Usually Take?
Usually, you’ll see mold cleanup take one to five days, depending on contamination and drying needs. Your cleanup timeline also depends on mold growth extent, affected materials, and whether you need repairs or testing afterward.
Can I Stay in My Home During Cleanup?
Usually, you shouldn’t stay; it’s a storm you don’t want indoors. If containment isn’t airtight, mold exposure and health risks rise. You’ll belong safest off-site until crews finish cleanup and verify safe air quality.
Does Homeowners Insurance Cover Sewage Mold Damage?
Usually, your homeowners policy won’t cover sewage mold damage unless you’ve added sewage coverage. You should review your mold insurance limits, document the loss quickly, and work with your insurer to confirm eligibility.
What Protective Gear Should I Wear During Cleanup?
Like armor, you should wear protective masks, safety goggles, disposable gloves, and protective clothing. Use ventilation equipment to reduce exposure, and consider mold testing before cleanup. You’ll stay safer and work confidently together.
How Can I Tell if Mold Is Still Growing?
You can tell mold’s still growing if you spot new discoloration, musty odors, or damp surfaces. Use inspection techniques like moisture readings and close visual checks; ongoing mold growth often appears in hidden, humid areas.
Conclusion
When sewage storms your home like a dark river, you win by acting fast: stop the source, dry the rooms, remove ruined materials, and seal the area before spores drift farther. Then inspect walls and floors for hidden growth and HEPA vacuum what remains. If the damage is widespread, call a mold pro. You can keep the house’s air clear by documenting each step and preventing the next backup before it starts.