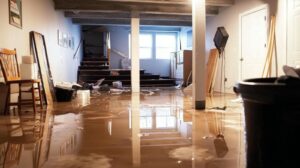
When disaster strikes, like a burst pipe flooding your basement, knowing how to react quickly can save you from extensive damage. First, you need to assess pipe damage the situation and shut off the water supply immediately. Documenting the damage is essential for insurance claims. But what comes next? Understanding the steps to minimize impact can make all the difference in restoring your home efficiently.
Key Takeaways
- Quickly identify the source of the leak and check for visible water pooling to assess damage severity.
- Shut off the main water valve immediately to minimize further water damage.
- Document all damage with photos and create an inventory list of affected items for insurance claims.
- Clean up standing water promptly using appropriate tools to prevent mold growth and further issues.
- Assess the damage thoroughly and seek professional help if necessary, especially for mold remediation.
Assessing the Situation
When a pipe bursts, how do you quickly assess the damage? Start by identifying the source of the leak. Check for visible water pooling or damp areas, as these can indicate the extent of water damage.
Take note of any affected materials, such as flooring, walls, or furniture, and be mindful of potential structural issues.
Next, evaluate the duration of the leak. If it’s been leaking for a while, damage can be more extensive, leading to mold growth or compromised structures. Document your findings with photos for insurance purposes.
In your emergency preparedness plan, ensure you have the necessary tools, like a moisture meter, to help gauge the severity of the situation.
The faster you assess the damage, the quicker you can take action to minimize water damage and protect your home. Remember, timely assessment is key to effective recovery.
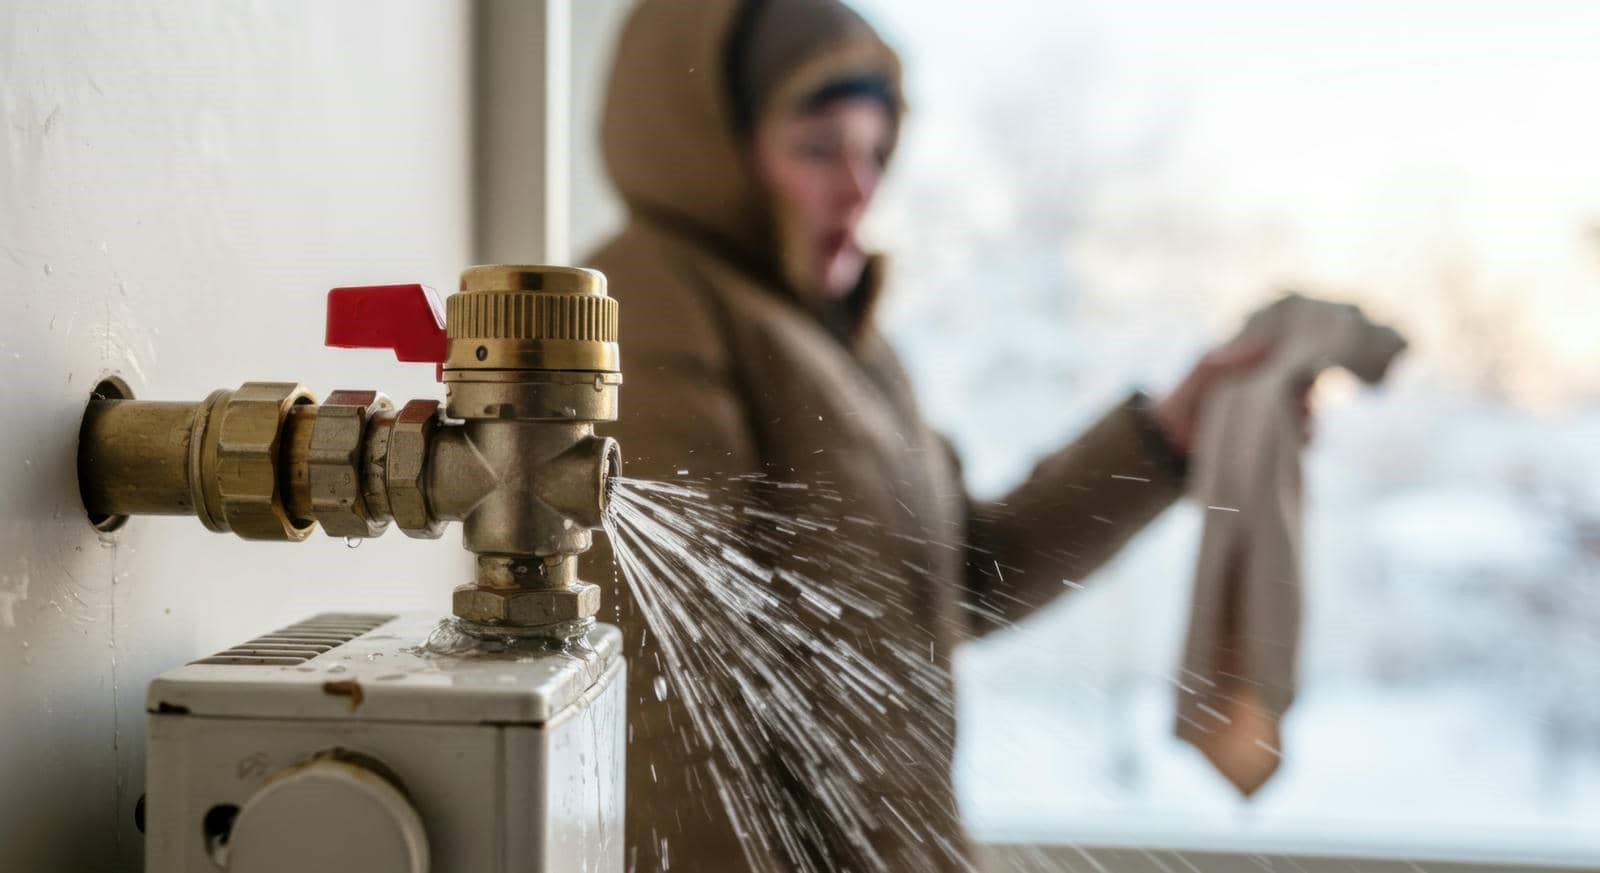
Shutting Off the Water Supply
To minimize damage from a burst pipe, quickly locate your main water valve and turn it off.
This stops the flow of water and prevents further flooding.
Don’t forget to turn off any connected appliances to avoid additional complications.
Locate Main Water Valve
Finding the main water valve quickly is vital to minimizing damage when a pipe bursts. Knowing the valve location will save you time and stress. Typically, the main water valve can be found near the perimeter of your home, often in the basement, crawl space, or near the water meter.
Here’s what to keep in mind when locating your valve:
Common water valve types: Look for ball valves (round handle) or gate valves (wheel-shaped).
Check the meter: If you spot a water meter, the valve is usually nearby.
Have a plan: Familiarize yourself with your home’s plumbing layout in advance.
Taking these steps ensures you’re prepared for emergencies, creating a sense of community and support among homeowners.
Turn Off Appliances
Shut off all appliances connected to the water supply to prevent further damage during a pipe burst. This includes washing machines, dishwashers, and any other water-using devices.
Turning off these appliances is essential for appliance safety and helps minimize water flow, reducing the risk of flooding. After addressing the main water valve, check for any leaks or issues in your appliances.
If possible, unplug them to avoid electrical hazards. Be sure to inform your household members about the situation to prevent anyone from accidentally turning them back on.
Documenting the Damage
After shutting off the water supply, it’s essential to document the damage thoroughly.
Start by collecting visual evidence, creating a detailed inventory list of affected items, and maintaining a date and time log for reference.
This documentation will be important for insurance claims and repair assessments.
Visual Evidence Collection
When dealing with burst pipe damage, collecting visual evidence is vital for effective documentation and remediation. Start by taking thorough photo documentation of the affected areas to ensure proper evidence preservation. This helps you, your team, and any professionals involved understand the extent of the damage.
- Capture close-ups of the burst area and surrounding damage.
- Take wide-angle shots to show context and overall impact.
- Document any water pooling or signs of mold growth.
These images play an important role in insurance claims, repairs, and future prevention measures.
Detailed Inventory List
Following visual evidence collection, creating a detailed inventory list is a vital step in documenting the damage from a burst pipe. This inventory checklist should include all affected materials and items, categorizing them for clarity.
Start with major structural components, like walls and flooring, then move to personal belongings and appliances. For each item, note the extent of damage and any necessary repairs.
This damage assessment helps in insurance claims and assists in prioritizing restoration efforts. Be thorough and accurate; your list will serve as an essential reference during the recovery process.
Date and Time Log
A date and time log is vital for documenting the damage caused by a burst pipe.
This log creates a clear damage timeline and provides critical timestamps that can aid insurance claims and repairs.
Keeping accurate records ensures you have all the necessary information when addressing the situation.
- Note the exact time and date when the pipe burst.
- Record the time of any actions taken, like shutting off the water.
- Include the date and time when professionals arrive to assess the damage.
Contacting a Professional
Burst pipes can cause significant damage, so it’s crucial to contact a professional immediately. An emergency plumber can assess the situation quickly and mitigate further harm. Don’t hesitate; the longer you wait, the worse the damage can become, leading to costly repairs.
When you call, provide details about the incident, including the pipe’s location and any visible damage. This information helps the plumber prepare for their visit.
Additionally, check your insurance policy; some plans cover burst pipe damage. If applicable, document the situation thoroughly, as your insurer may require evidence for your claim.
Choosing a licensed plumber ensures you’re working with someone who understands local codes and can handle any necessary repairs.
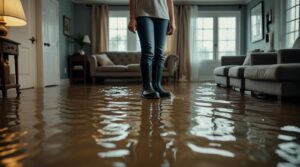
Cleaning Up Standing Water
Once you’ve contacted a professional, the next critical step is cleaning up standing water to prevent further damage and mold growth.
Effective water extraction is essential to ensure your home remains safe and healthy. Here’s how to get started:
Gather the right tools: Use a wet/dry vacuum, mops, and towels for efficient cleanup.
Remove furniture and belongings: Relocate items to prevent water damage and facilitate moisture control.
Check for hidden pockets of water: Inspect corners and under appliances to verify all standing water is removed.
Don’t underestimate the importance of acting quickly.
If you let standing water sit, it can lead to significant issues down the line, including mold growth and structural damage.
Drying the Affected Area
To effectively prevent further damage, you need to dry the affected area as quickly as possible. Start by using a dehumidifier to extract moisture from the air and materials. Set it to a high setting for ideal results, and keep it running until humidity levels drop considerably.
Next, enhance air circulation by opening windows and doors if the weather permits. Use fans to direct airflow across wet surfaces, which will expedite the drying process. Make sure to position the fans strategically to cover all damp areas thoroughly.
Monitor the drying progress regularly; this ensures that you address any lingering moisture promptly. If you notice persistent dampness, consider additional dehumidifier usage or professional assistance.
Preventing Mold Growth
As moisture lingers in the aftermath of a burst pipe, it’s essential to take immediate steps to prevent mold growth.
Mold can develop quickly in damp environments, so you’ll want to act fast. Here are some effective strategies for mold prevention:
Control humidity: Use dehumidifiers to maintain indoor humidity levels below 60%.
Ventilate: Open windows and doors to promote airflow and reduce moisture build-up.
Inspect regularly: Check for hidden leaks and damp spots in your home, especially in basements and crawl spaces.
Repairing the Burst Pipe
After addressing mold prevention, the next step is repairing the burst pipe to stop further damage.
First, identify the type of pipe materials you’re dealing with, as this affects your repair method. Common materials include PVC, copper, and PEX, each requiring specific techniques.
Use leak detection methods to pinpoint the exact location of the burst. If the damage is minor, you can often use a repair clamp or epoxy to seal the leak temporarily.
For more significant damage, you might need to cut out the affected section and replace it with a new piece, making sure you use compatible pipe materials.
Be certain to turn off the water supply before starting repairs, and keep the area dry to avoid additional hazards.
Once you’ve successfully repaired the pipe, double-check for leaks before restoring the water supply to confirm your efforts have been effective and your home is safe.
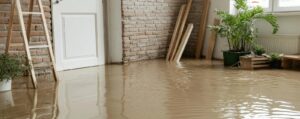
Restoring Your Home
Once you’ve repaired the burst pipe, it’s crucial to turn your focus to restoring your home to its pre-damage condition.
Water damage can affect your living space considerably, but with the right approach, you can reclaim your home.
Start by evaluating the affected areas. Look for signs of mold or structural damage.
Next, consider these key steps in your home restoration process:
- Dry Everything: Use fans and dehumidifiers to eliminate moisture.
- Clean and Sanitize: Wash walls and floors to prevent mold growth.
- Replace Damaged Materials: If drywall or flooring is compromised, replace them promptly.
Taking these actions restores your home and helps create a safe and welcoming environment.
Don’t hesitate to seek professional help if needed; you’re not alone in this journey of home restoration.
Frequently Asked Questions
What Should I Do if Water Is Still Leaking After Shutting off the Supply?
If water’s still leaking after shutting off the supply, implement emergency measures. Start by using leak detection tools to identify the source. Then, contain the water and call a professional to assess the damage.
How Can I Prevent Future Pipe Bursts in Winter?
To prevent future pipe bursts in winter, you should install pipe insulation and ensure proper winter preparation. Keep your home heated, let faucets drip, and seal any drafts to protect your plumbing system effectively.
Are There Any Insurance Claims I Should Consider After Damage?
Steering through insurance claims can feel like untangling holiday lights. You should check your insurance coverage for water damage, then follow the claim process carefully to ensure you receive the compensation you deserve for repairs.
What Tools Do I Need for Minor Pipe Repairs?
For minor pipe repairs, you’ll need essential tools like a pipe wrench, plumber’s tape, a hacksaw, PVC cement, and a bucket. These tools help you effectively fix leaks and maintain your plumbing system.
How Long Does It Typically Take for Pipes to Dry Completely?
Typically, drying time for pipes can range from a few hours to several days, depending on moisture levels and air circulation. You’ll want to monitor conditions closely to ensure thorough drying and prevent further issues.
Summary
In the aftermath of a burst pipe, swift action transforms chaos into control. By shutting off the water, documenting damage, and swiftly cleaning up, you’re not just preventing further issues; you’re reclaiming your space. Imagine your home, once soaked, now drying under the warmth of your efforts. As you repair and restore, envision a fresh start, free from mold’s shadow. With each step, you’re not just fixing a problem; you’re revitalizing your sanctuary.