When water makes an unexpected visit, it can lead to significant challenges. It’s essential to assess the damage thoroughly and take immediate action to mitigate further issues. Understanding the best solutions for water damage repair can save you time and money in the long run. From effective drying techniques to mold prevention strategies, knowing the steps to take can make all the difference in restoring your space. Let’s explore the most effective methods to tackle this situation.
Key Takeaways
- Utilize moisture meters and thermal imaging to accurately assess hidden moisture and damage severity before repairs begin.
- Implement thorough drying and dehumidification techniques using high-capacity dehumidifiers and fans to prevent mold growth.
- Remove damaged materials promptly, ensuring safe disposal and proper ventilation to promote effective drying.
- Replace insulation and drywall with moisture-resistant materials to safeguard against future water damage.
- Conduct routine inspections and preventative maintenance on roofs, gutters, and drainage systems to mitigate risks of water intrusion.
Assessing the Extent of Water Damage
How do you determine the severity of water damage in your property?
Begin with thorough water detection methods, such as moisture meters and thermal imaging cameras. These tools help identify hidden moisture behind walls and under flooring, which is critical for an accurate damage assessment.
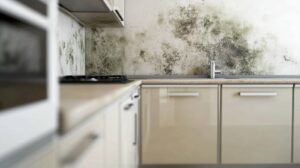
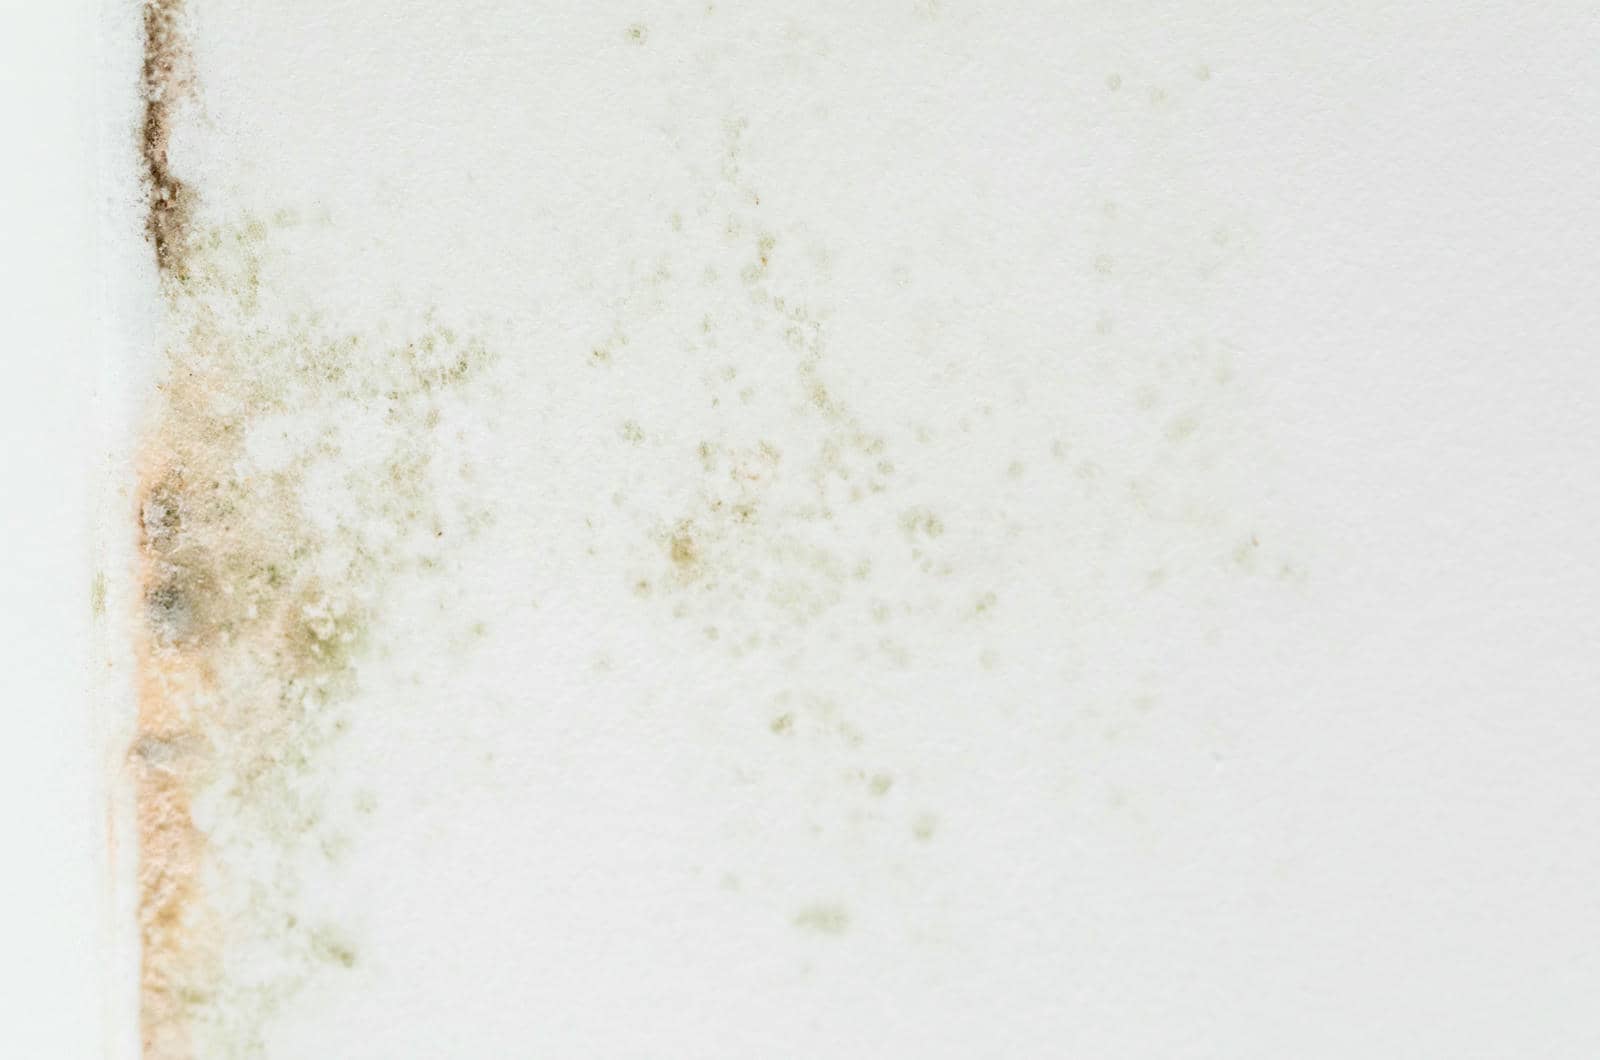
Next, inspect visible damage—check for discoloration, warping, or mold growth, as these indicators reveal the extent of the problem.
Evaluate the affected materials; porous items like drywall and carpet absorb water more readily and may require replacement.
Don’t forget to assess the duration of exposure; longer exposure increases the risk of structural damage and mold growth.
Document your findings carefully, noting the locations and severity of damage. This won’t only aid in repair decisions but also support any insurance claims.
Turning Off Utilities and Water Supply
Before starting any water damage repair, it’s essential to locate and shut off the main water valve to prevent further flooding.
Next, guarantee safety by turning off the electricity at the circuit breaker and disabling the gas supply if applicable.
This step minimizes risks and prepares your space for effective recovery efforts.
Locate Main Water Valve
In any water damage situation, knowing how to locate your main water valve is vital for minimizing further damage.
Quickly identifying the water valve location can save your home from extensive flooding. Here’s how you can find it:
-
Basement or Crawl Space: Check near the foundation wall, often near the front of the house.
-
Outside the Home: Look for a valve in a box near the street, usually marked with a “W” for water.
-
Underneath the Kitchen Sink: Check the area where the water supply lines connect.
-
Near the Water Heater: This is another common area for main valve identification.
Knowing where to turn off your water supply can be imperative during emergencies.
Stay prepared and protect your home.
Shut Off Electricity
After locating the main water valve, it’s important to address your electricity supply to prevent any hazards during water damage repairs.
Start by locating your circuit breaker panel; this is vital for ensuring water safety. Switch off the main power supply to eliminate the risk of electrical hazards caused by water contact. If you’re unsure which breakers to turn off, it’s best to shut off the entire system.
Always use dry hands and stand on a dry surface while handling the panel to minimize risks. Once the power’s off, you can proceed with repairs safely, knowing you’ve taken the necessary precautions.
Disable Gas Supply
To secure safety during water damage repairs, you must also disable the gas supply. This step is essential for guaranteeing gas line safety and preventing potential hazards.
Here’s how to proceed:
- Locate your gas meter, usually found outside your home.
- Turn the valve on the gas line to the off position, typically a quarter turn.
- Verify all appliances are turned off to prevent gas leaks.
- Familiarize yourself with emergency procedures in case of a gas leak.
Removing Damaged Ceiling Materials
Before you begin removing damaged ceiling materials, you need to assess the severity of the damage to determine the extent of the work required.
Utilize safe removal techniques to guarantee your safety and prevent further damage to the structure.
Finally, confirm proper disposal of the materials in accordance with local regulations to maintain a clean and safe environment.
Assessing Damage Severity
How can you effectively assess damage severity when it comes to removing damaged ceiling materials? A thorough damage assessment is vital to determine the extent of the issue.
Look for these severity indicators:
-
Stains or discoloration: Dark spots may indicate prolonged moisture exposure.
-
Sagging areas: Bulges suggest water accumulation, weakening the structure.
-
Peeling paint or wallpaper: This can signal underlying moisture issues.
-
Mold growth: Visible mold indicates serious moisture problems that need immediate attention.
Safe Removal Techniques
Removing damaged ceiling materials requires careful execution to guarantee safety and prevent further issues. Start by evaluating the extent of the damage and confirming the area is clear of hazards.
Use safe extraction methods like wearing protective gear and using proper tools, such as a utility knife or pry bar, to minimize injury. Cut away any waterlogged drywall or plaster, ensuring you handle materials gently to avoid falling debris.
Once the damaged sections are removed, implement effective drying techniques. Use fans and dehumidifiers to promote airflow and expedite moisture removal.
Monitor the area regularly to confirm that it’s drying properly, preventing mold growth. Following these steps will help you achieve a safe and effective removal process.
Disposal of Materials
Proper disposal of damaged ceiling materials is essential for maintaining a safe and healthy environment.
When tackling this task, you should prioritize efficient waste management and consider material recycling options.
Here’s how to proceed:
-
Assess the extent of damage to determine what needs removal.
-
Seal damaged materials in plastic bags to prevent debris spread.
-
Transport materials to a local recycling center or designated disposal site.
-
Document the process for insurance claims and future reference.
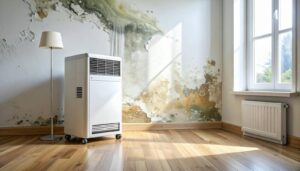
Drying the Affected Area
Effective drying of the affected area is essential to preventing further water damage and mold growth. Start by implementing ventilation techniques to enhance air circulation. Open windows, use fans, and consider air movers to quickly evaporate moisture. This combination not only expedites drying but also helps eliminate stagnant air, reducing musty odors.
Next, utilize moisture meters to accurately assess humidity levels in your environment. These devices provide real-time feedback, allowing you to identify areas still retaining moisture and adjust your drying efforts accordingly. Regularly monitor these readings to guarantee you’re achieving ideal dryness.
Don’t overlook hidden spaces like behind walls and under floors; they can harbor moisture that leads to mold. By being thorough in your drying process, you foster a healthier living space and protect your property investment.
Prioritize these steps to effectively restore your home and safeguard your well-being.
Cleaning and Disinfecting Surfaces
Once you’ve thoroughly dried the affected area, the next step involves cleaning and disinfecting surfaces to eliminate any remaining contaminants.
Utilizing proper surface sanitization techniques is essential to guarantee a safe environment. You’ll want to select effective cleaning agents that can tackle mold, bacteria, and other harmful pathogens.
Here’s a quick guide to get you started:
- Identify the surface type: Different materials require specific cleaning agents.
- Choose the right cleaning agent: Look for EPA-approved disinfectants for maximum efficacy.
- Apply a two-step process: Clean first, then disinfect to guarantee thorough sanitization.
- Allow adequate contact time: Follow manufacturer instructions for how long the disinfectant should remain wet on the surface.
Repairing Structural Damage
When addressing water damage, you must first assess the structural integrity of your home to identify any compromised areas.
After ensuring everything is safe, focus on effective drying and dehumidification methods to prevent further deterioration.
Finally, proceed with repairing walls and floors to restore both functionality and aesthetics.
Assessing Structural Integrity
As you begin evaluating structural integrity after water damage, it’s crucial to identify any compromised elements that could pose safety risks.
Conducting a thorough structural evaluation is key in the damage assessment process. Pay attention to the following areas:
-
Foundation: Check for cracks or shifts that may indicate instability.
-
Beams and Joists: Look for signs of warping or water damage, which can weaken support.
-
Walls: Inspect for bowing or bulging, suggesting underlying issues.
-
Roof: Verify there are no leaks or sagging that could lead to further complications.
Drying and Dehumidification
To effectively repair structural damage caused by water, it’s essential to initiate the drying and dehumidification process promptly.
Start by guaranteeing proper moisture control; this involves utilizing high-capacity dehumidifiers to reduce humidity levels in affected areas.
Next, enhance air circulation by strategically placing fans to promote airflow, accelerating the drying process.
Pay close attention to hidden spaces like wall cavities and under flooring, as trapped moisture can lead to further damage.
Regularly monitor moisture levels with a hygrometer to guarantee the environment remains conducive to effective drying.
Repairing Walls and Floors
Once the drying and dehumidification processes are underway, attention must shift to repairing the walls and floors that sustained damage.
Effective wall restoration techniques and appropriate flooring replacement options are essential for a successful recovery. You’ll want to assess the extent of the damage before proceeding.
Consider the following steps:
-
Inspect for mold: Confirm mold isn’t present, as this can lead to health issues.
-
Choose wall restoration techniques: Options include patching, resurfacing, or replacing drywall.
-
Evaluate flooring replacement options: Decide between laminate, tile, or hardwood based on the severity of the damage.
-
Seal and paint: Once repairs are made, seal and paint to protect against future water intrusion.
Replacing Insulation and Drywall
When water damage occurs, replacing insulation and drywall becomes essential to restoring your home’s integrity and preventing mold growth.
Start by evaluating the affected areas and removing damaged insulation. Different insulation types, such as fiberglass or foam board, may be appropriate depending on your home’s needs and local climate. Make sure that you choose moisture-resistant options to enhance durability.
Once the insulation is replaced, focus on drywall installation. Cut the drywall to fit the spaces, securing it properly to the studs. Use moisture-resistant drywall in areas prone to humidity, such as bathrooms or basements.
After installation, tape and mud the seams for a smooth finish, and be sure to sand and prime before painting. This thorough approach not only repairs the damage but also contributes to a healthier living environment, making certain your home remains a safe and welcoming space for you and your family.
Applying Mold Prevention Techniques
Although replacing insulation and drywall is crucial after water damage, applying mold prevention techniques is equally important to safeguard your home.
To effectively combat mold growth, consider the following strategies:
-
Utilize mold resistant materials: Opt for drywall and insulation specifically designed to resist moisture and mold.
-
Enhance air circulation: Guarantee proper airflow in your home by using exhaust fans, opening windows, and strategically placing furniture.
-
Control humidity levels: Keep indoor humidity below 60% by using dehumidifiers and regularly checking for leaks.
-
Regularly inspect vulnerable areas: Make it a habit to examine basements, bathrooms, and kitchens for signs of mold or moisture.
Painting and Finishing Touches
After you’ve completed the essential repairs and mold prevention measures, the next step is to focus on painting and finishing touches to restore your home’s aesthetic appeal.
Start with color selection; choose hues that reflect your personal style while also complementing your interior. Opt for lighter shades to create an airy feel or bolder tones for a striking statement.
Next, consider finish types. Matte finishes can effectively hide imperfections, while satin and semi-gloss options offer durability and ease of cleaning, especially in high-traffic areas.
Don’t forget about trim and moldings; a fresh coat in a contrasting color can enhance architectural details and elevate the overall look.
Finally, take your time and guarantee even coverage for a professional finish. With careful attention to these aspects, your home won’t only look beautiful but will also feel inviting and welcoming.
Implementing Preventative Measures for the Future
To effectively safeguard your home against future water damage, you must take proactive steps that address potential vulnerabilities.
Implementing preventative measures is vital for maintaining a secure living environment. Start by integrating robust waterproofing solutions in key areas of your home.
Consider these essential practices:
- Conduct routine inspections of your roof, gutters, and downspouts to identify blockages or wear.
- Seal cracks and gaps in your foundation and walls to prevent water intrusion.
- Install sump pumps in basements to manage excess groundwater effectively.
- Ensure proper drainage around your property, directing water away from your home’s foundation.
Conclusion
In the face of water damage, acting swiftly can mean the difference between a mere inconvenience and a costly disaster, much like the fabled tale of the tortoise and the hare. By diligently evaluating damage, removing affected materials, and implementing preventative measures, you not only restore your property but also safeguard your peace of mind. Remember, a little foresight today can prevent a deluge of trouble tomorrow, ensuring your home remains a sanctuary against nature’s whims.